Postcards from Bodmin Moor

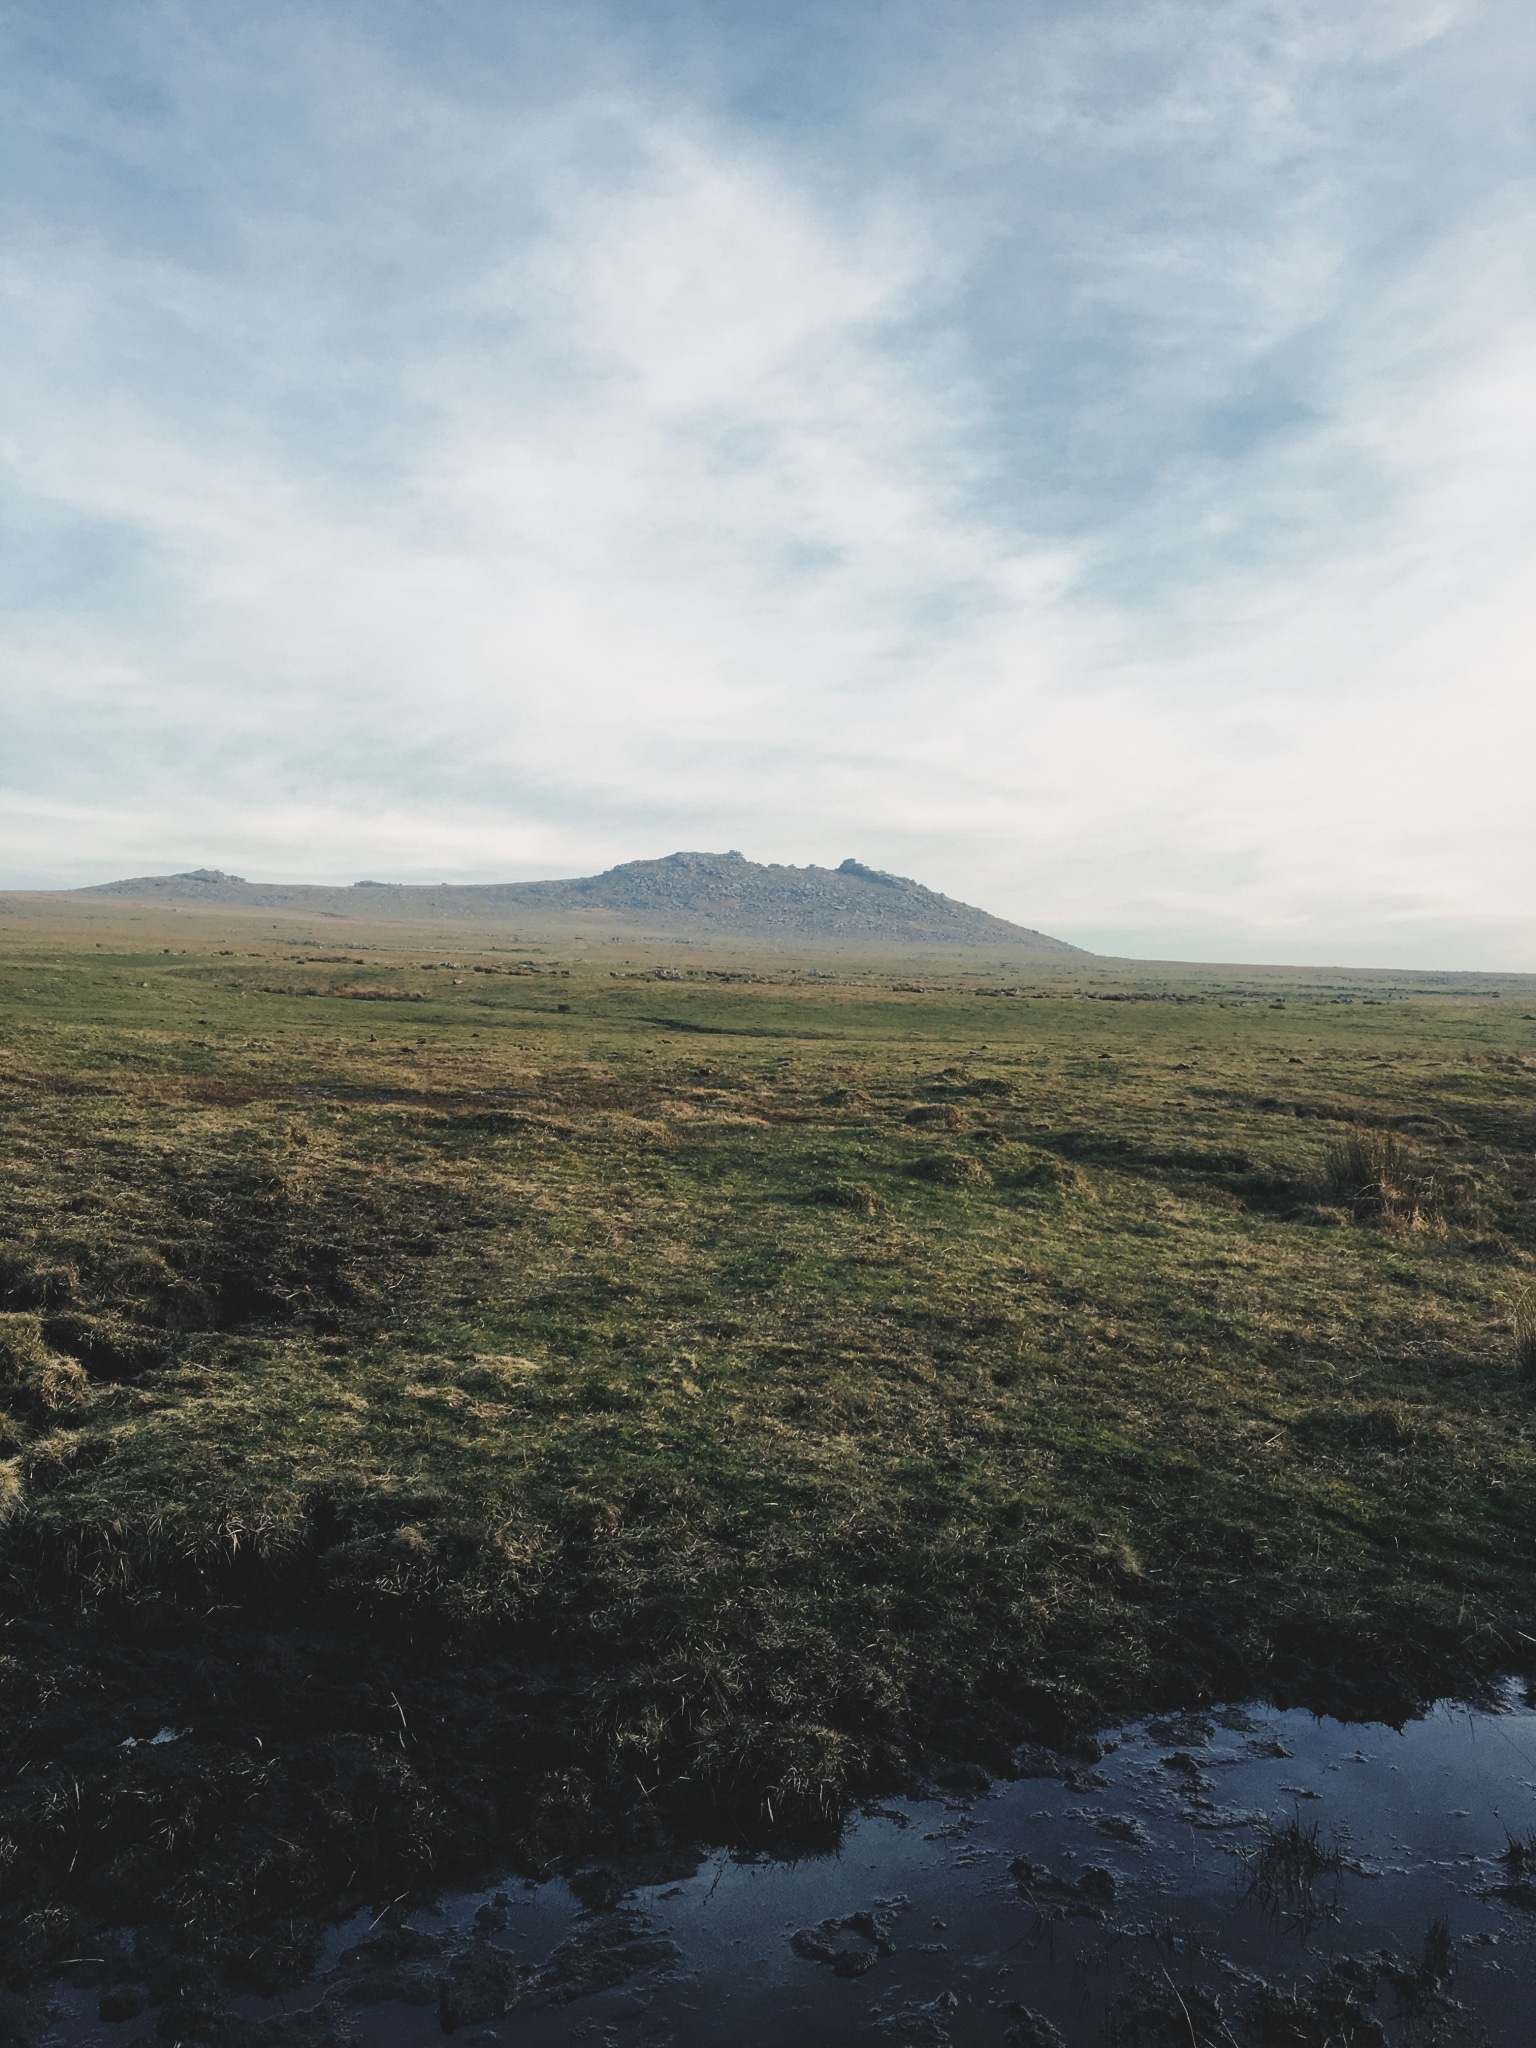
TL;DR: Took some photos, edited them. Scroll to the bottom for the results.

I’ve worked at Venn for about a year now, and I’ve heard the term ‘feeding’ whispered around the office many a time. I wondered if I’d ever have an encounter with this elusive ‘feed’, or whether the phenomenon was long-lost in the annals of Venn history. As it turns out, ‘feeds’ are (allegedly) making a comeback, and the time had finally come for me to take part.

It didn’t take too long for me to decide on the subject of my feed: photography. More specifically, photo editing. I’ve always had an interest in photography, but never delved much deeper than pointing-and-shooting and then – if I was feeling really adventurous – doing a little Lightroom tweaking or slapping a preset filter on it. I wanted to take this opportunity to familiarise myself with editing raw images, and to create photographs that were more than just “presentable” and were things that I’d be happy to hang on my wall (or at the very least to set as my desktop background or something).

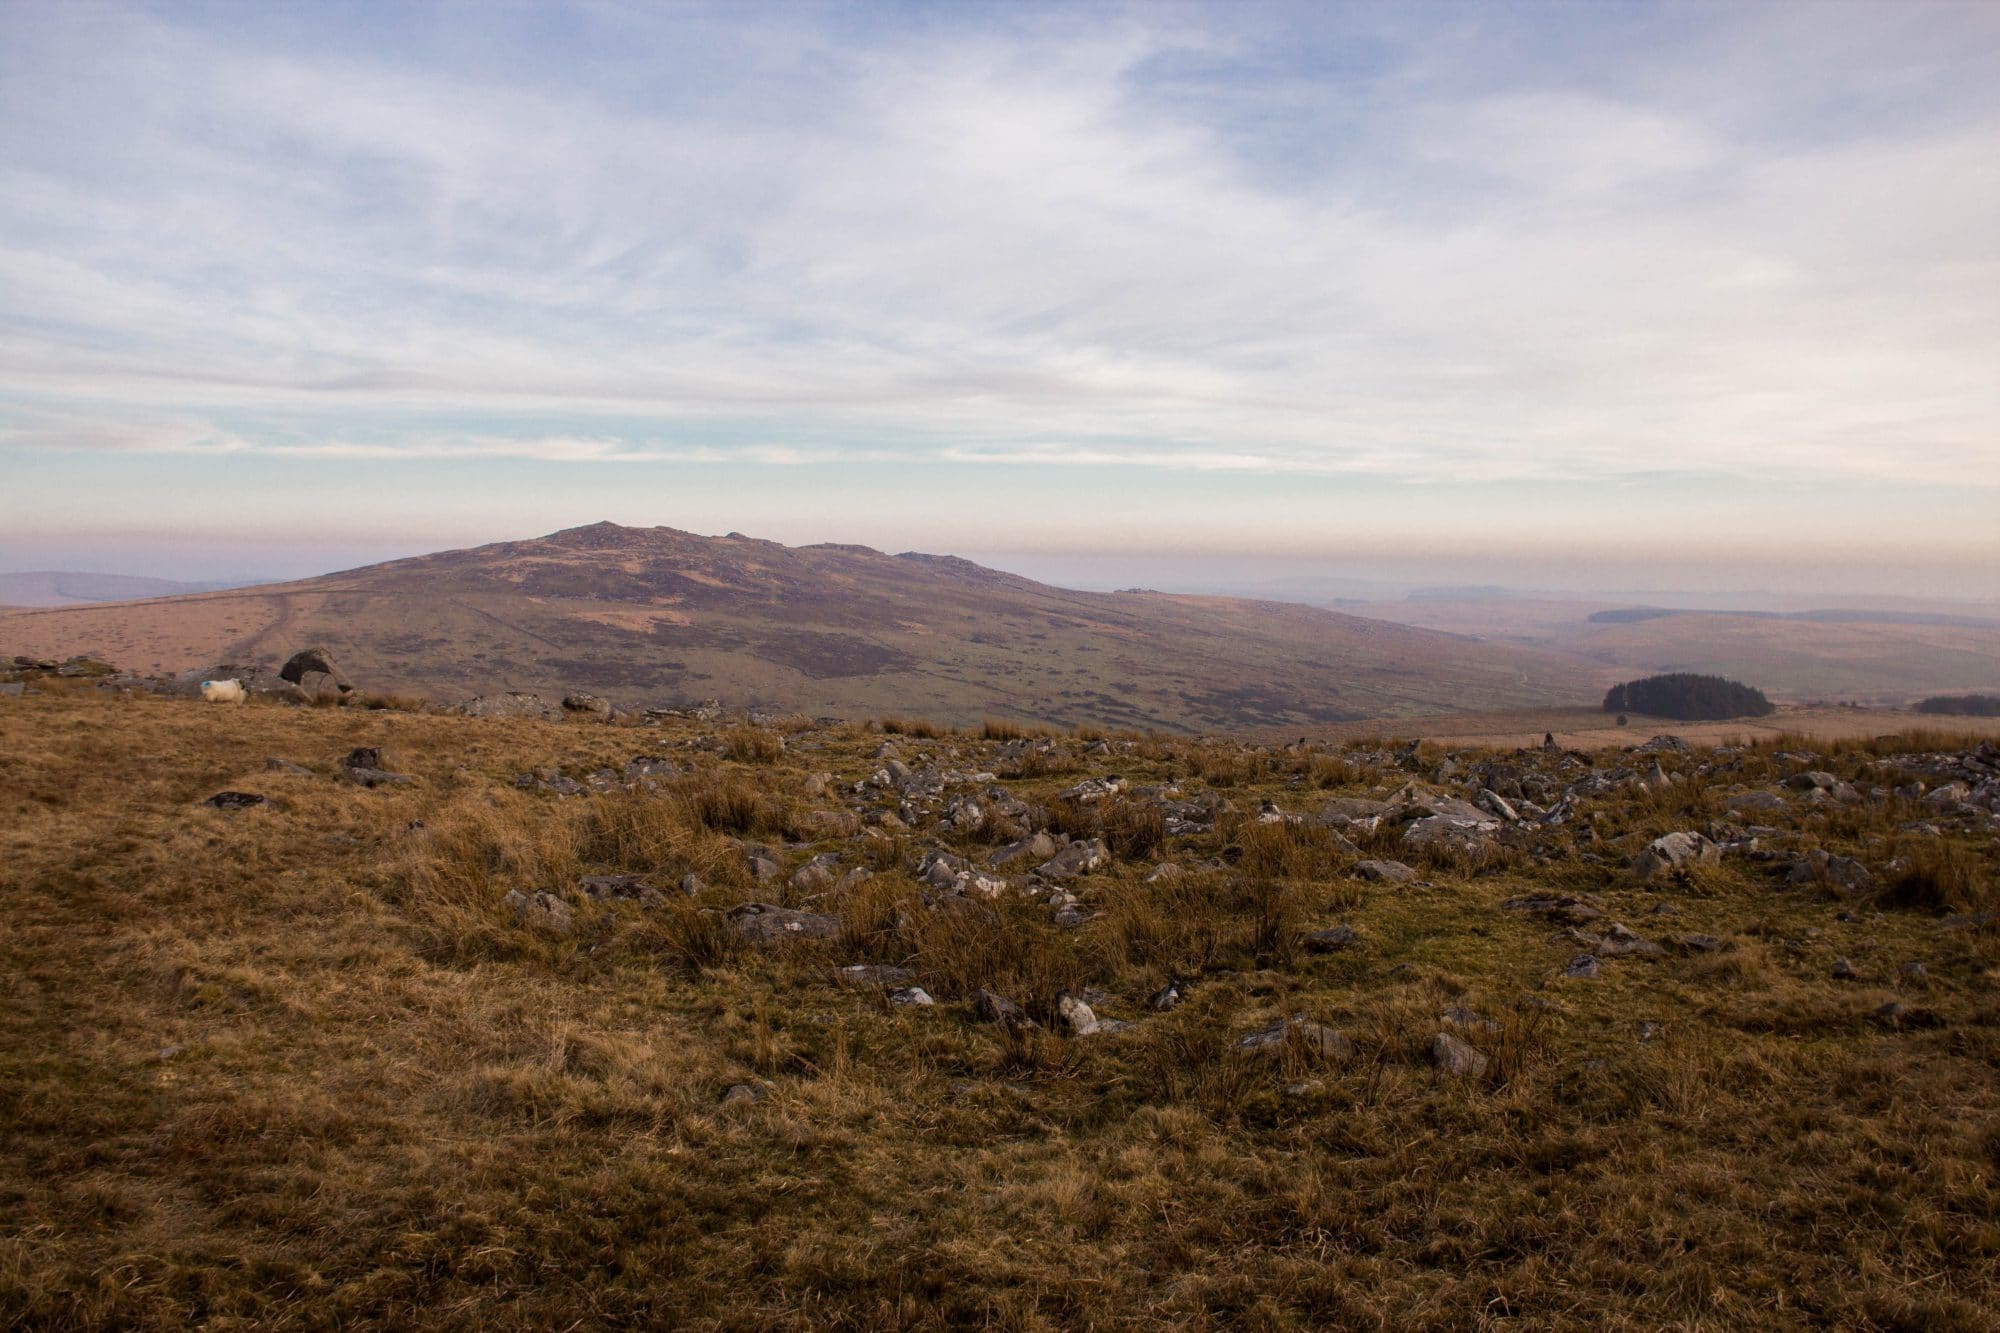
I picked Rough Tor on Bodmin Moor to photograph – a place that have been on my to-visit list ever since I moved to Cornwall four years ago. I have always had a fascination with tors, and cultivated a romantic mental image of barren swathes of moorland, characterised by neolithic stone circles and punctuated by wind-polished cairns and logan stones. Real Hound of the Baskervilles type stuff.


I started my day by burying myself in some research – seeking out the work of some of my favourite photographers and trying to determine what about their work attracted me so much. Most of my favourite photographers are landscape photographers; I find myself naturally drawn to images with very few, if any, humans or human-made elements in them. So, for this feed, I decided to tackle editing landscape images, and leave portraiture and other subjects for another day.

One of my favourite photographers is Kevin Russ, who captures landscapes using only an iPhone. His devastatingly beautiful images of great big American prairies and even greater, even bigger American mountains are the visual equivalent of being towel-whipped right in the goddamn eyes (but in a really, REALLY nice way). Some classic favourites include the likes of Ansel Adams, David Brookover, and Eliot Porter. I knew that I wanted to try to edit at least one or two images in a way inspired by the silver gelatin process that characterises Adams’ and Brookover’s work too.

I knew that nothing I was going to do would compare to their work – of course – but research is a big motivator for me. Some of the features that I realised all of my favourite photographers’ works share are usually some degree of washed-out-ness, and dramatic and / or cinematic qualities. I am drawn to imagery that instil a sense of quiet, and a sense of smallness.

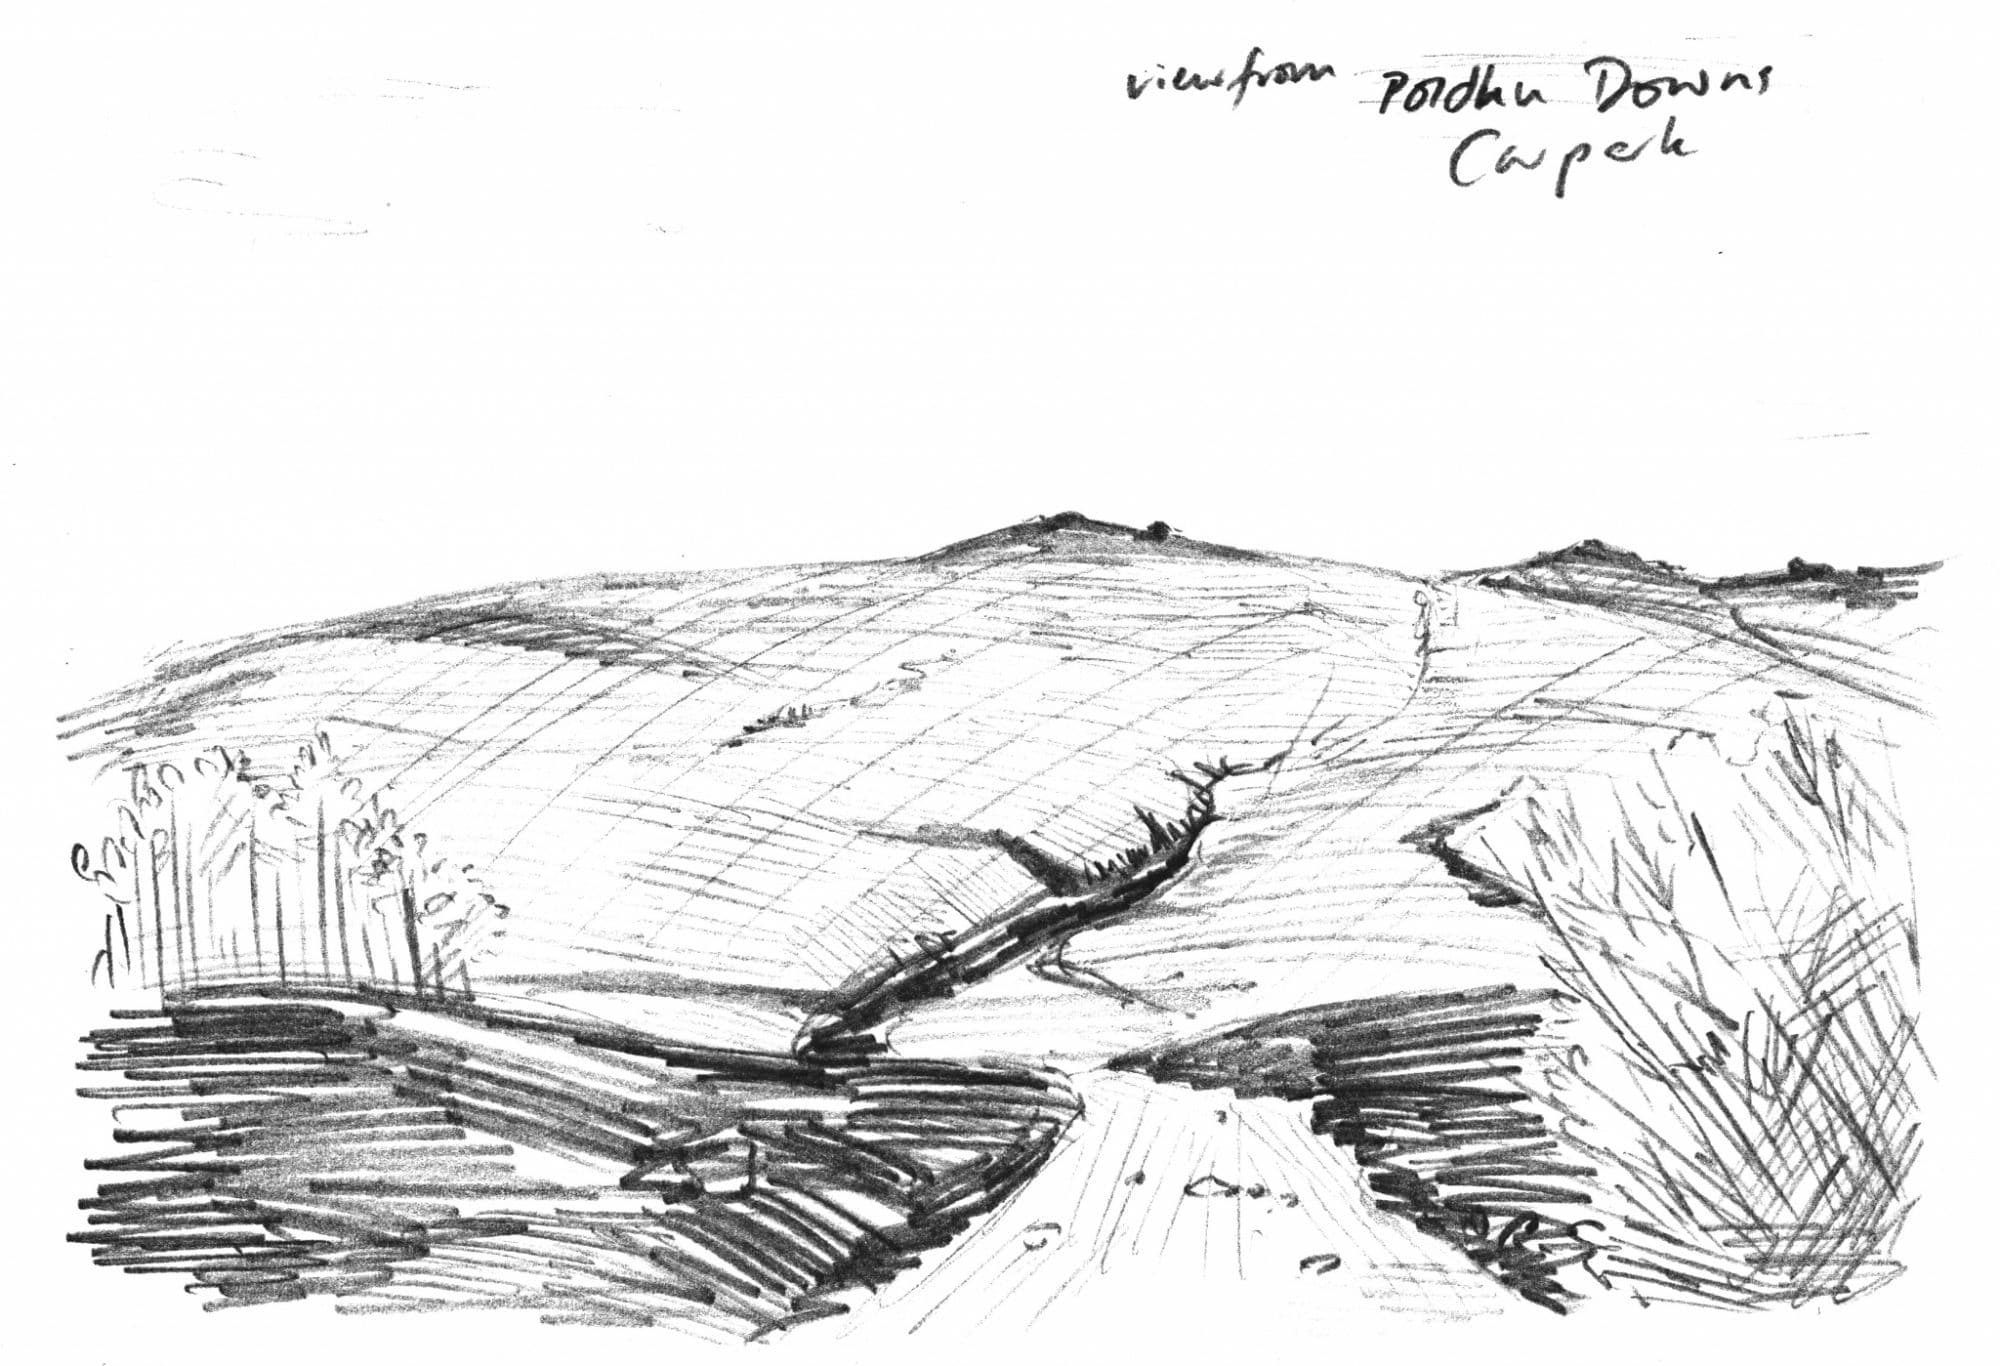
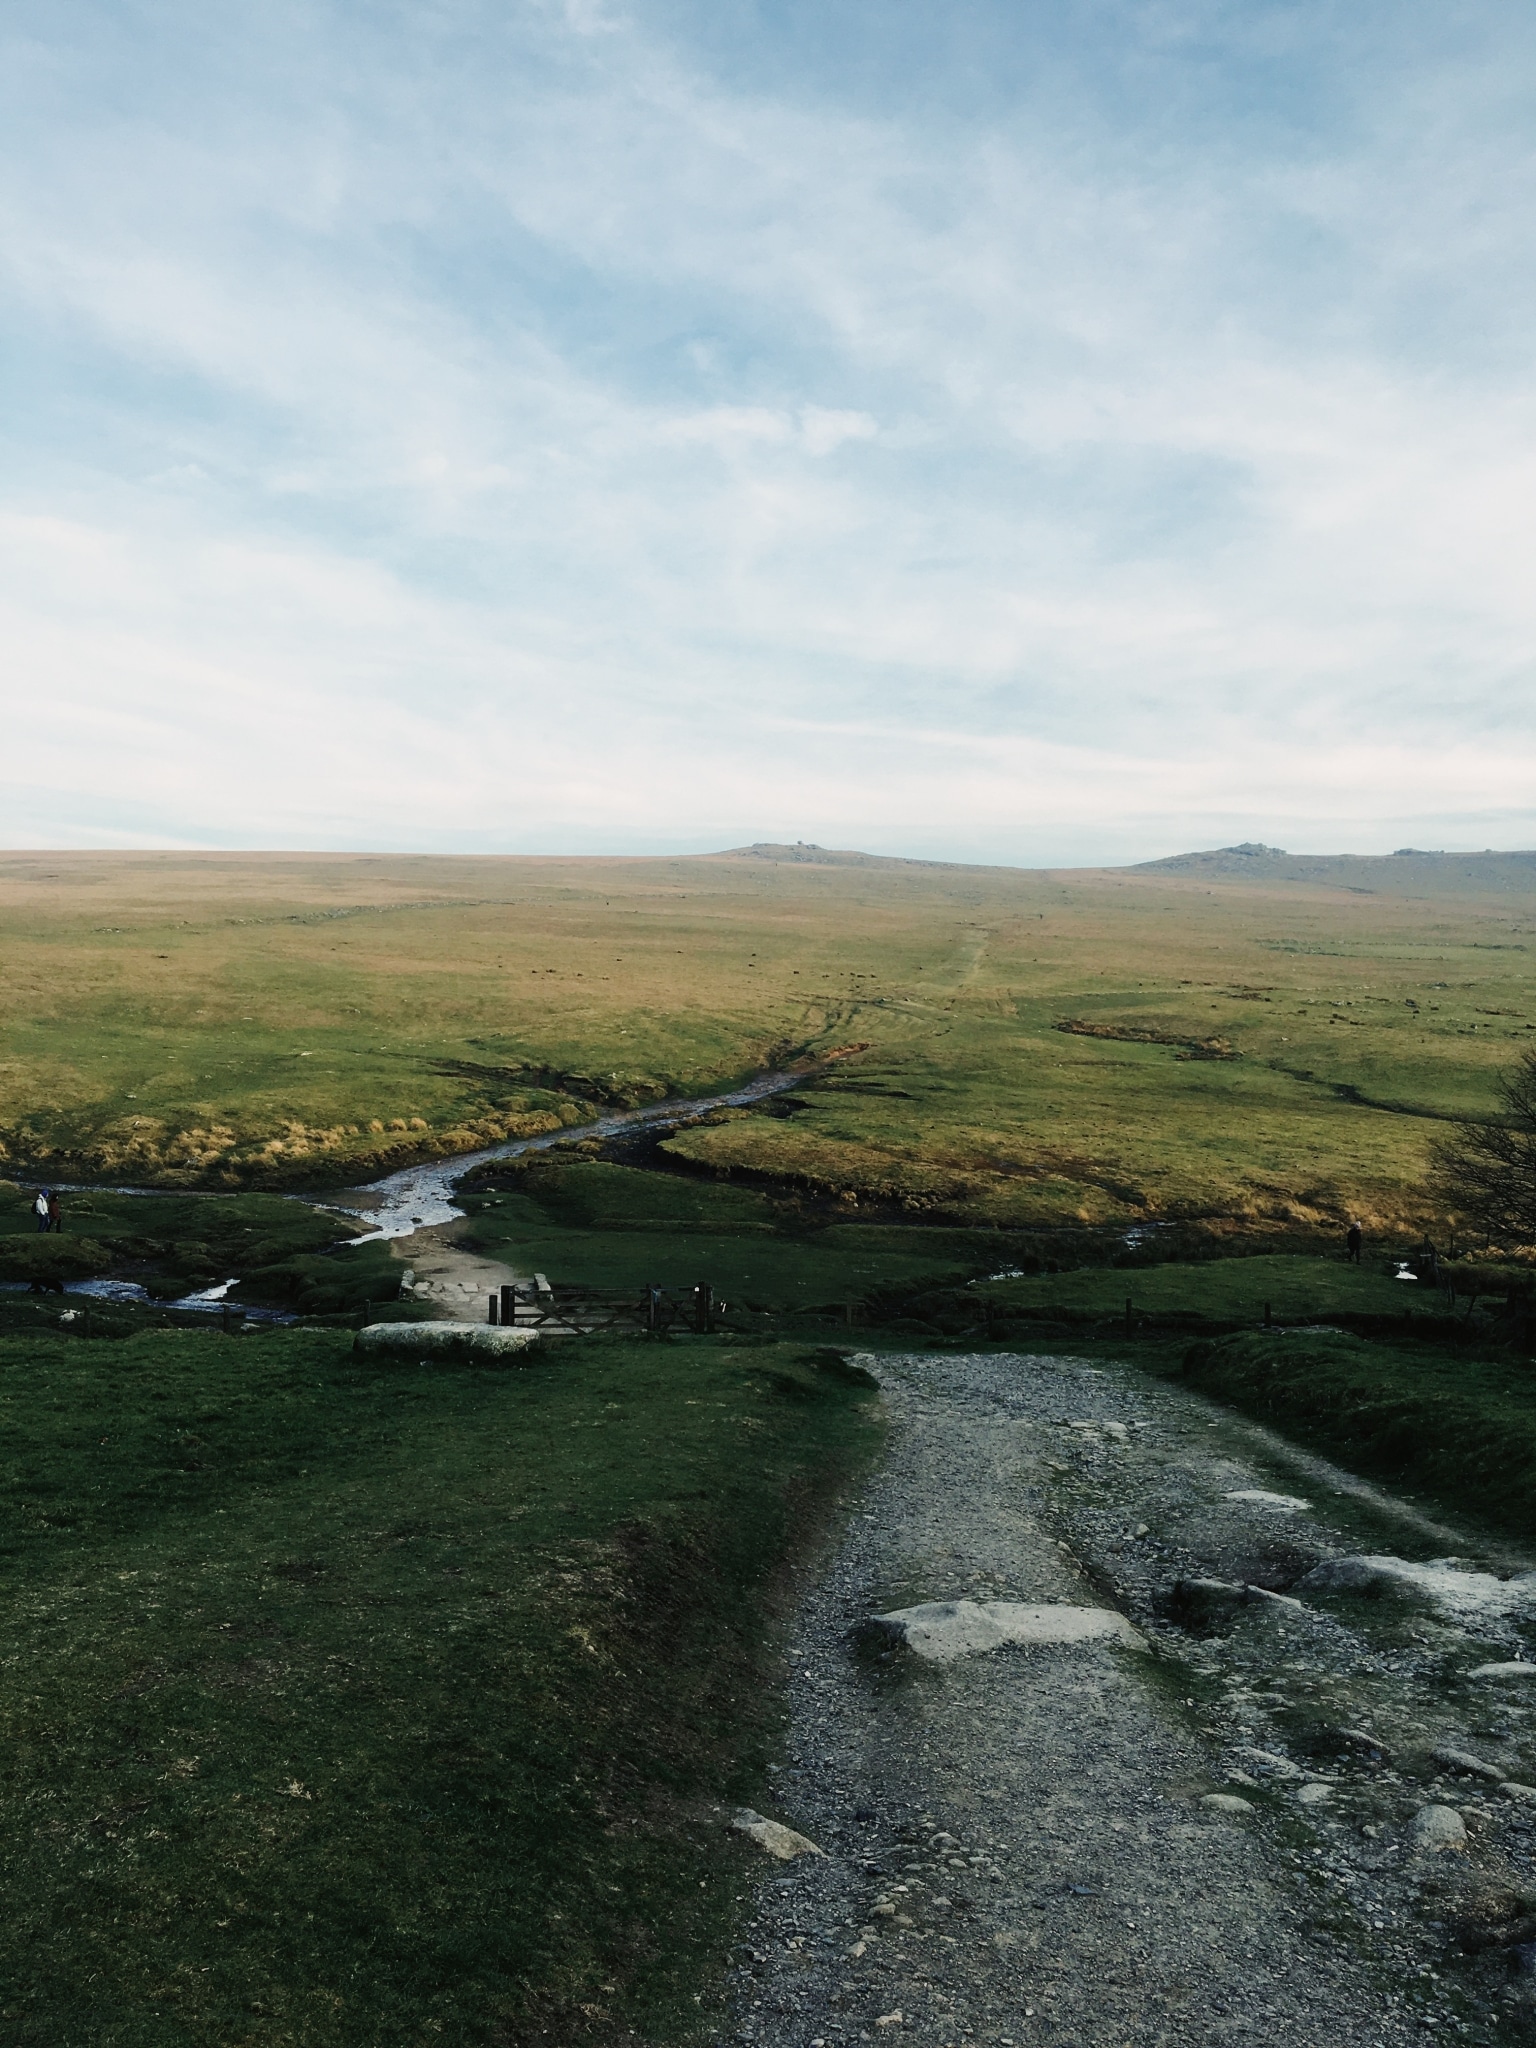
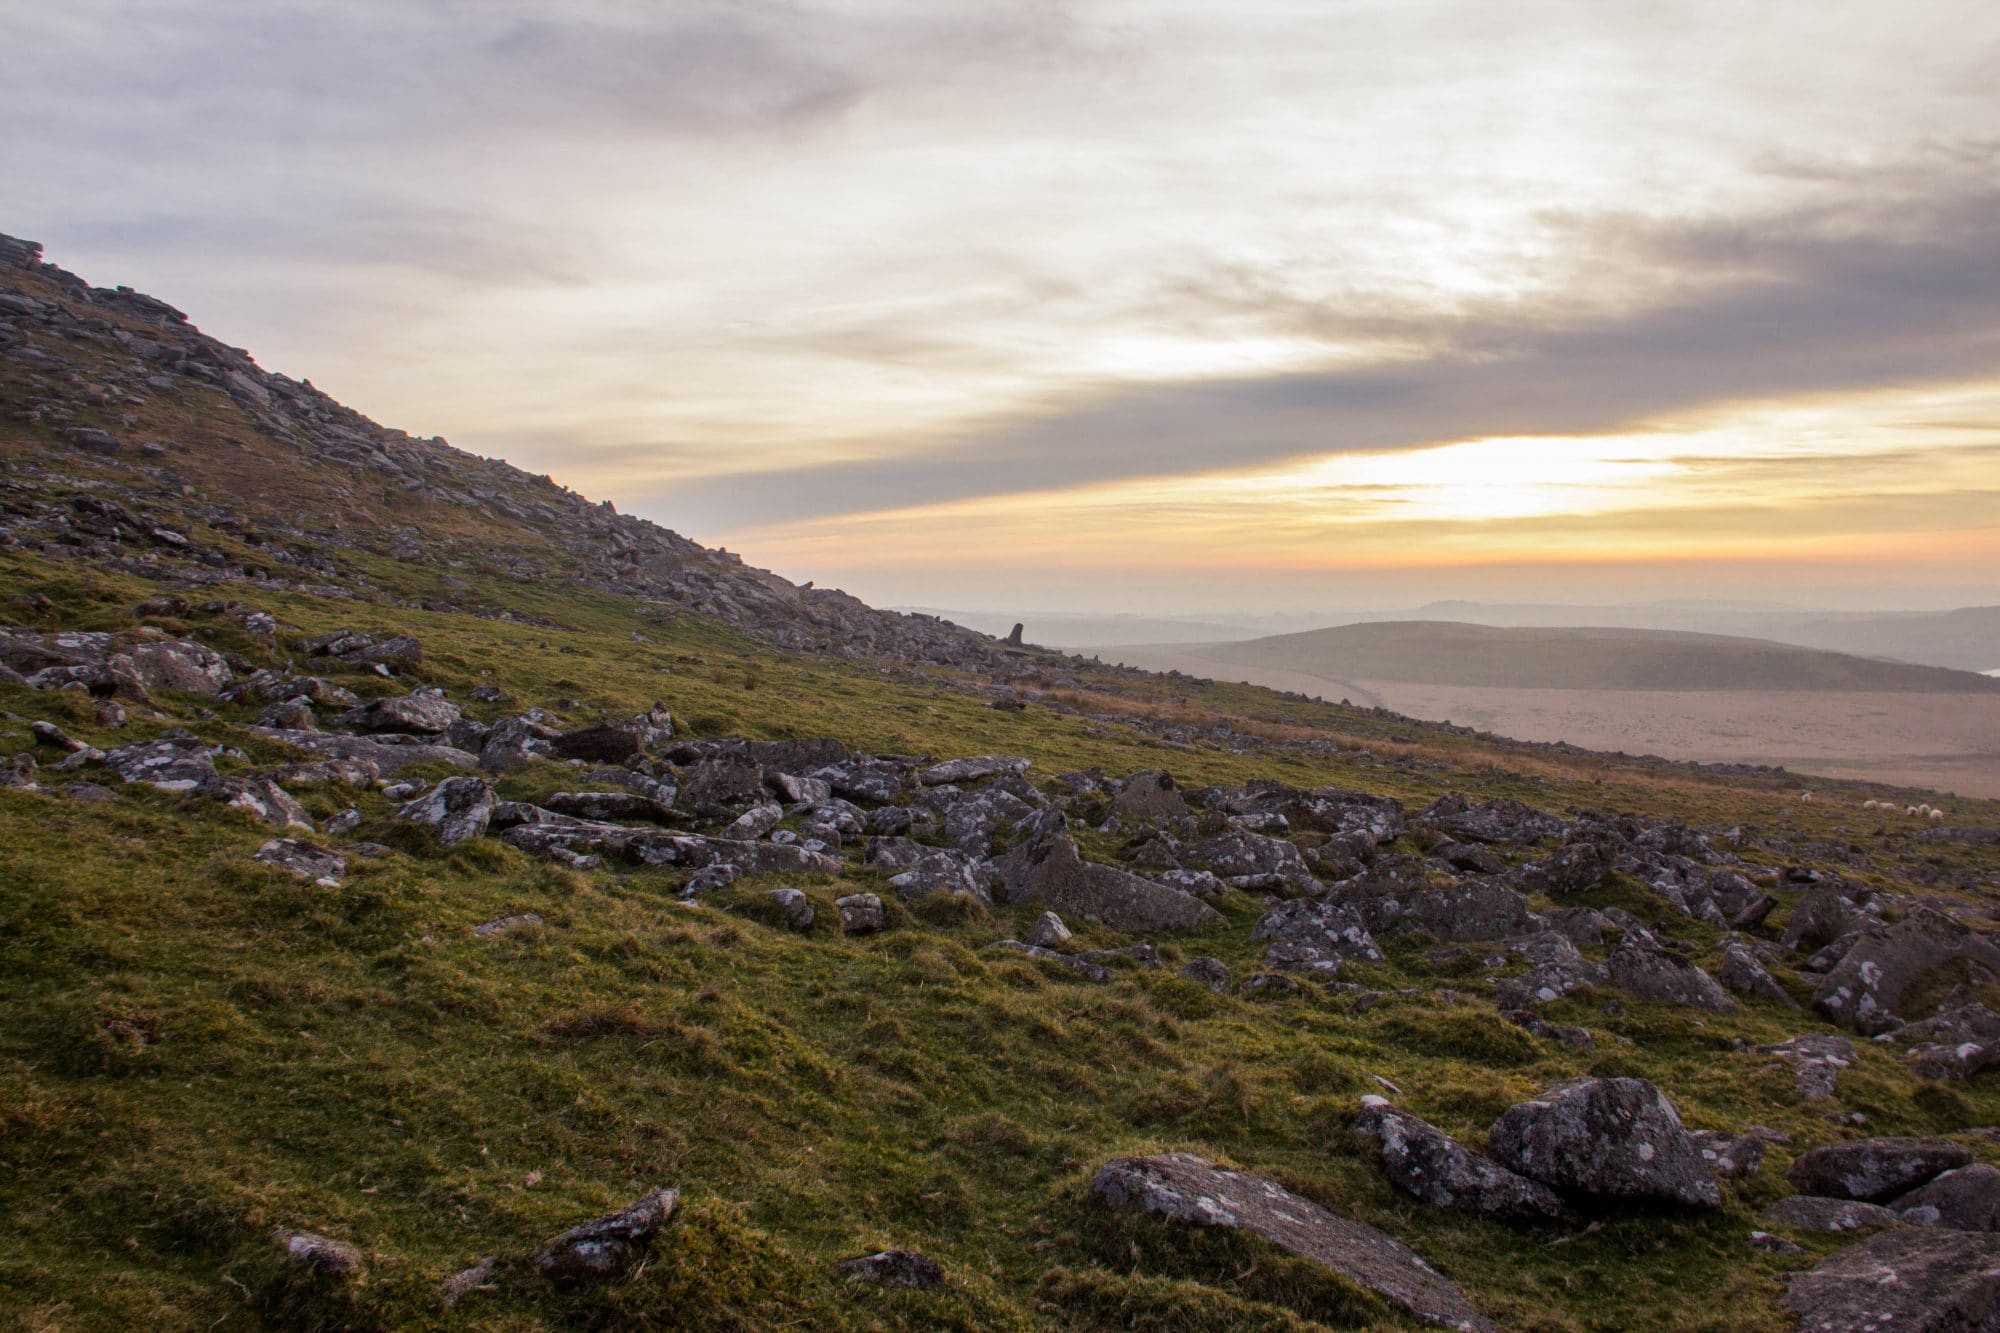
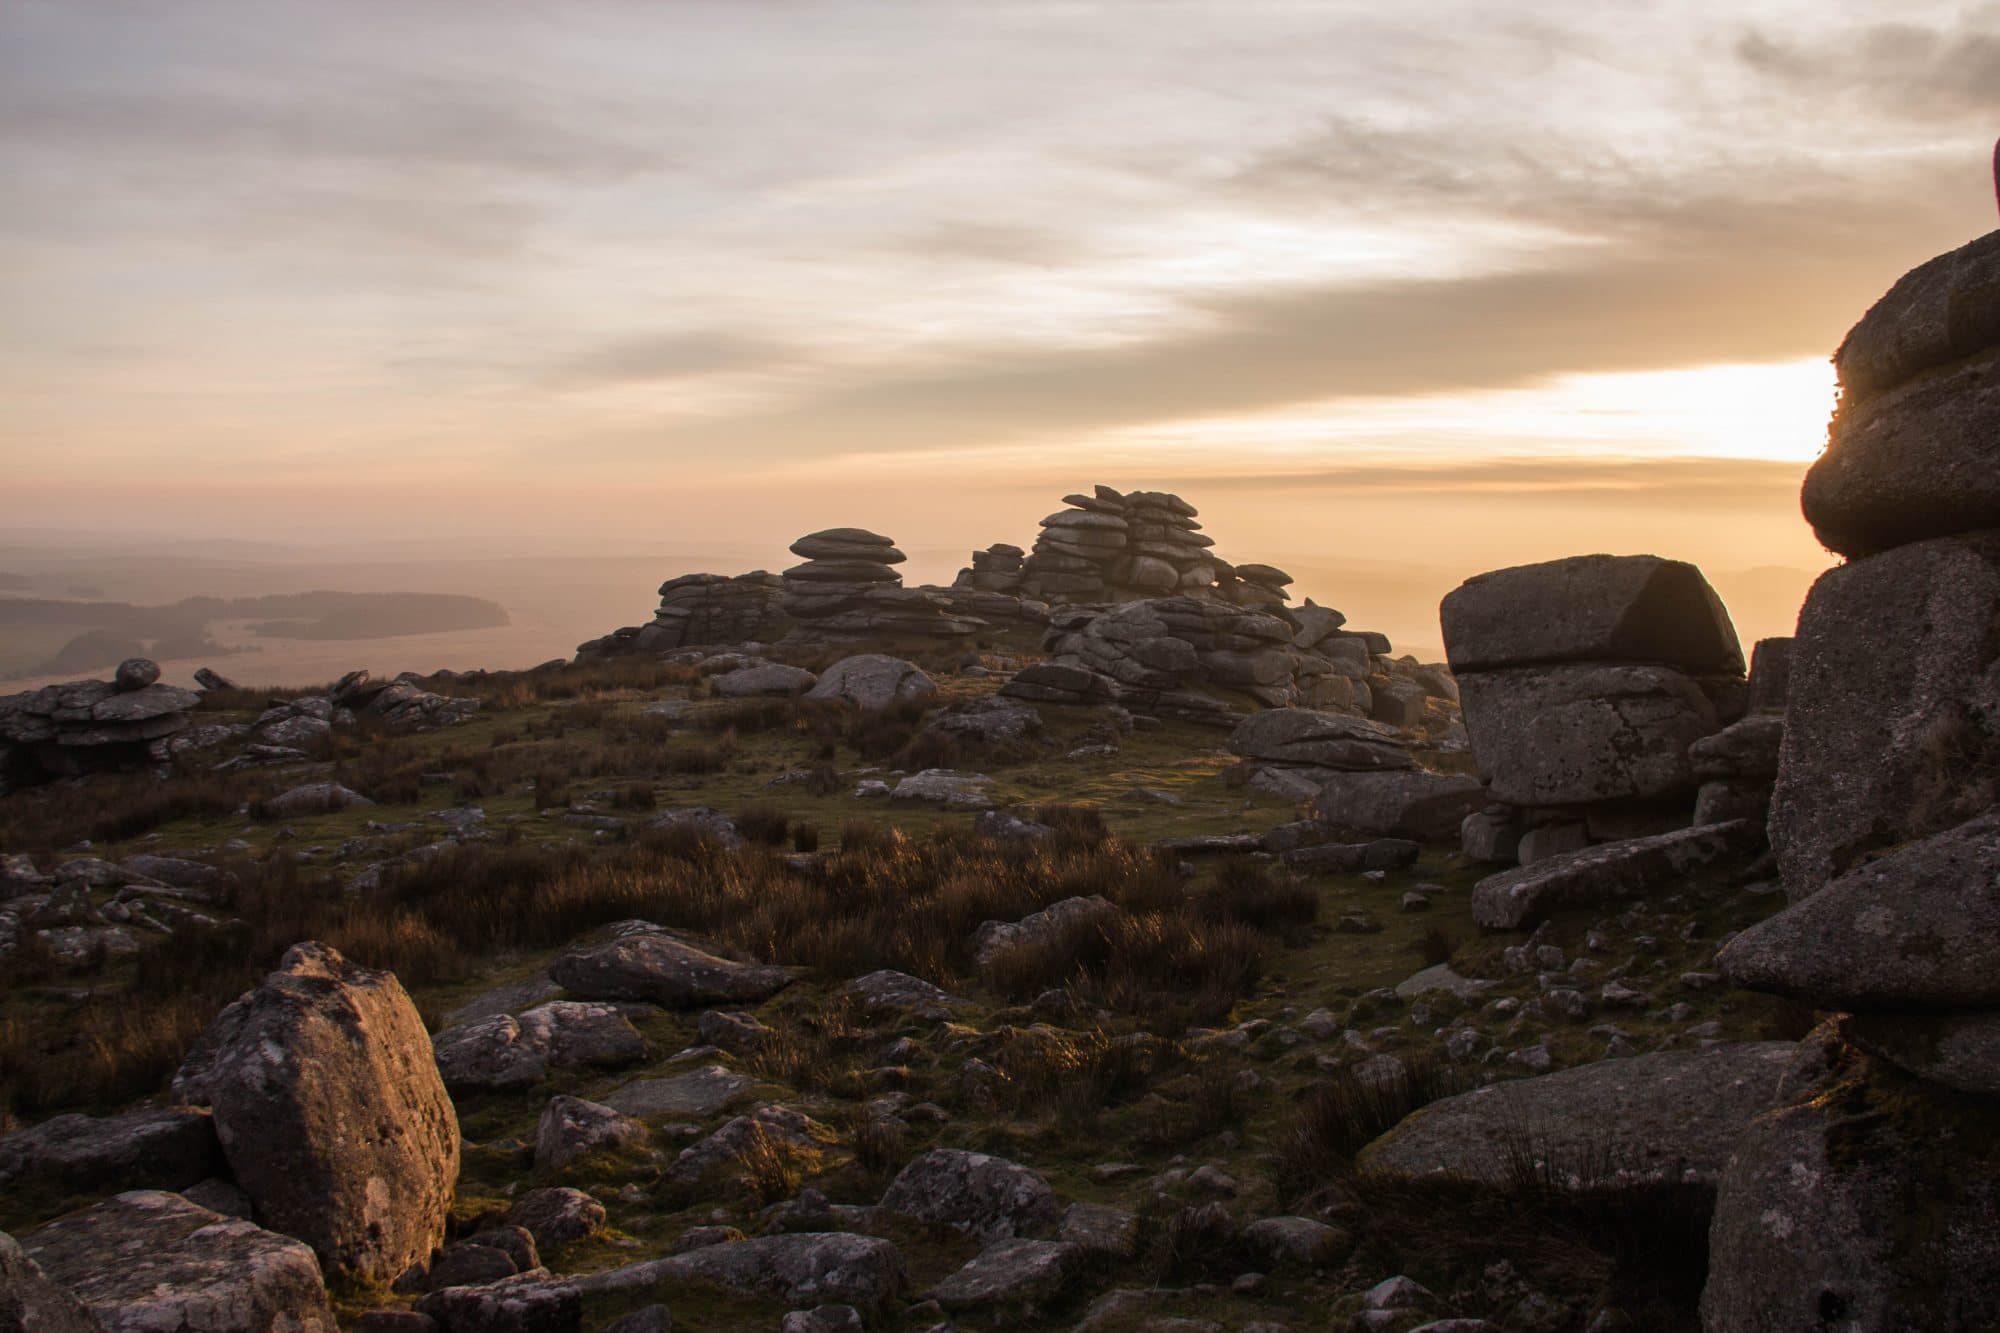
I opted to try and capture the moors in the late-afternoon light, so I gathered my things (and the dog) and set off for Bodmin Moor just after 2pm. I spent around three hours wandering about, meandering my way to the top of Rough Tor from Poldhu Downs carpark, absorbing the ancient energy of the moor. All of it – the remnants of neolithic settlements, the precariously stacked granite, the wind-swept landscape – it was all exactly what I was hoping for, and it was only enhanced by the setting sun.


Many of the contemporary photographers I like place an emphasis on lowering the harshness of the light, deepening shadows, and bringing out colours that may be hidden in darker areas of the image. While I really like imagery looking a little washed-out and faded, I felt it was a shame to pursue that effect at the price of losing the colours of the late afternoon sun.

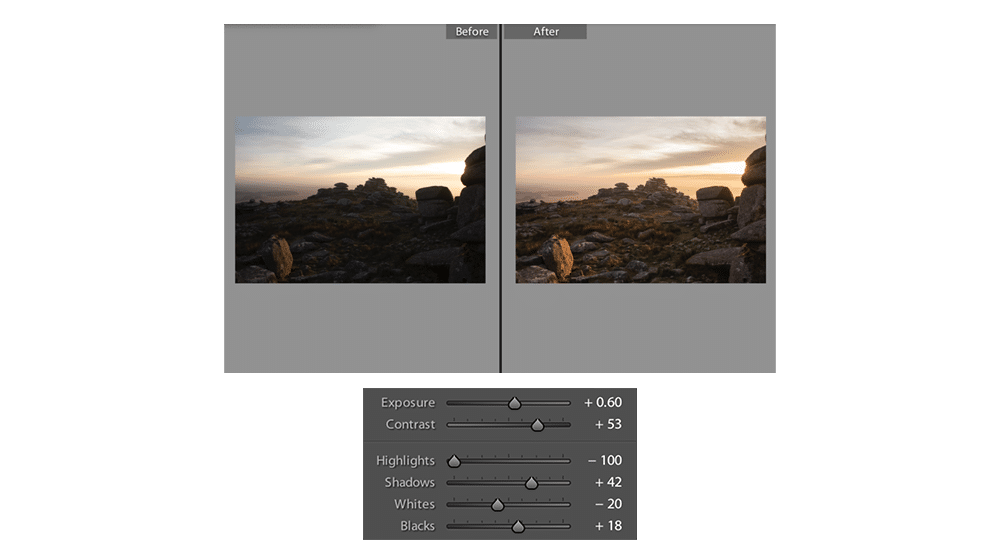
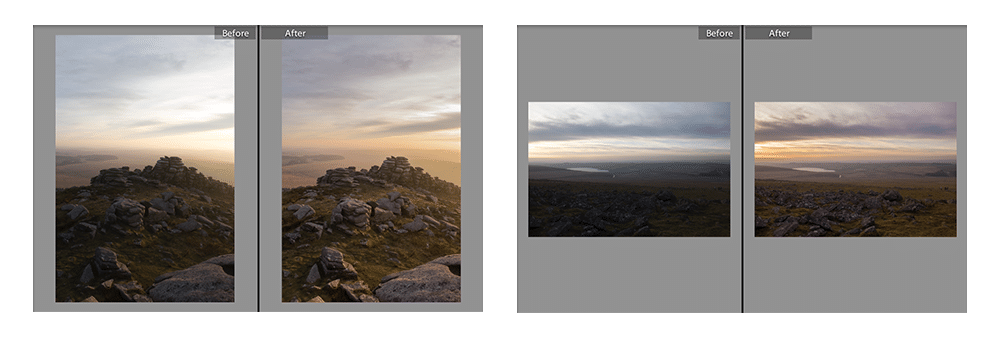
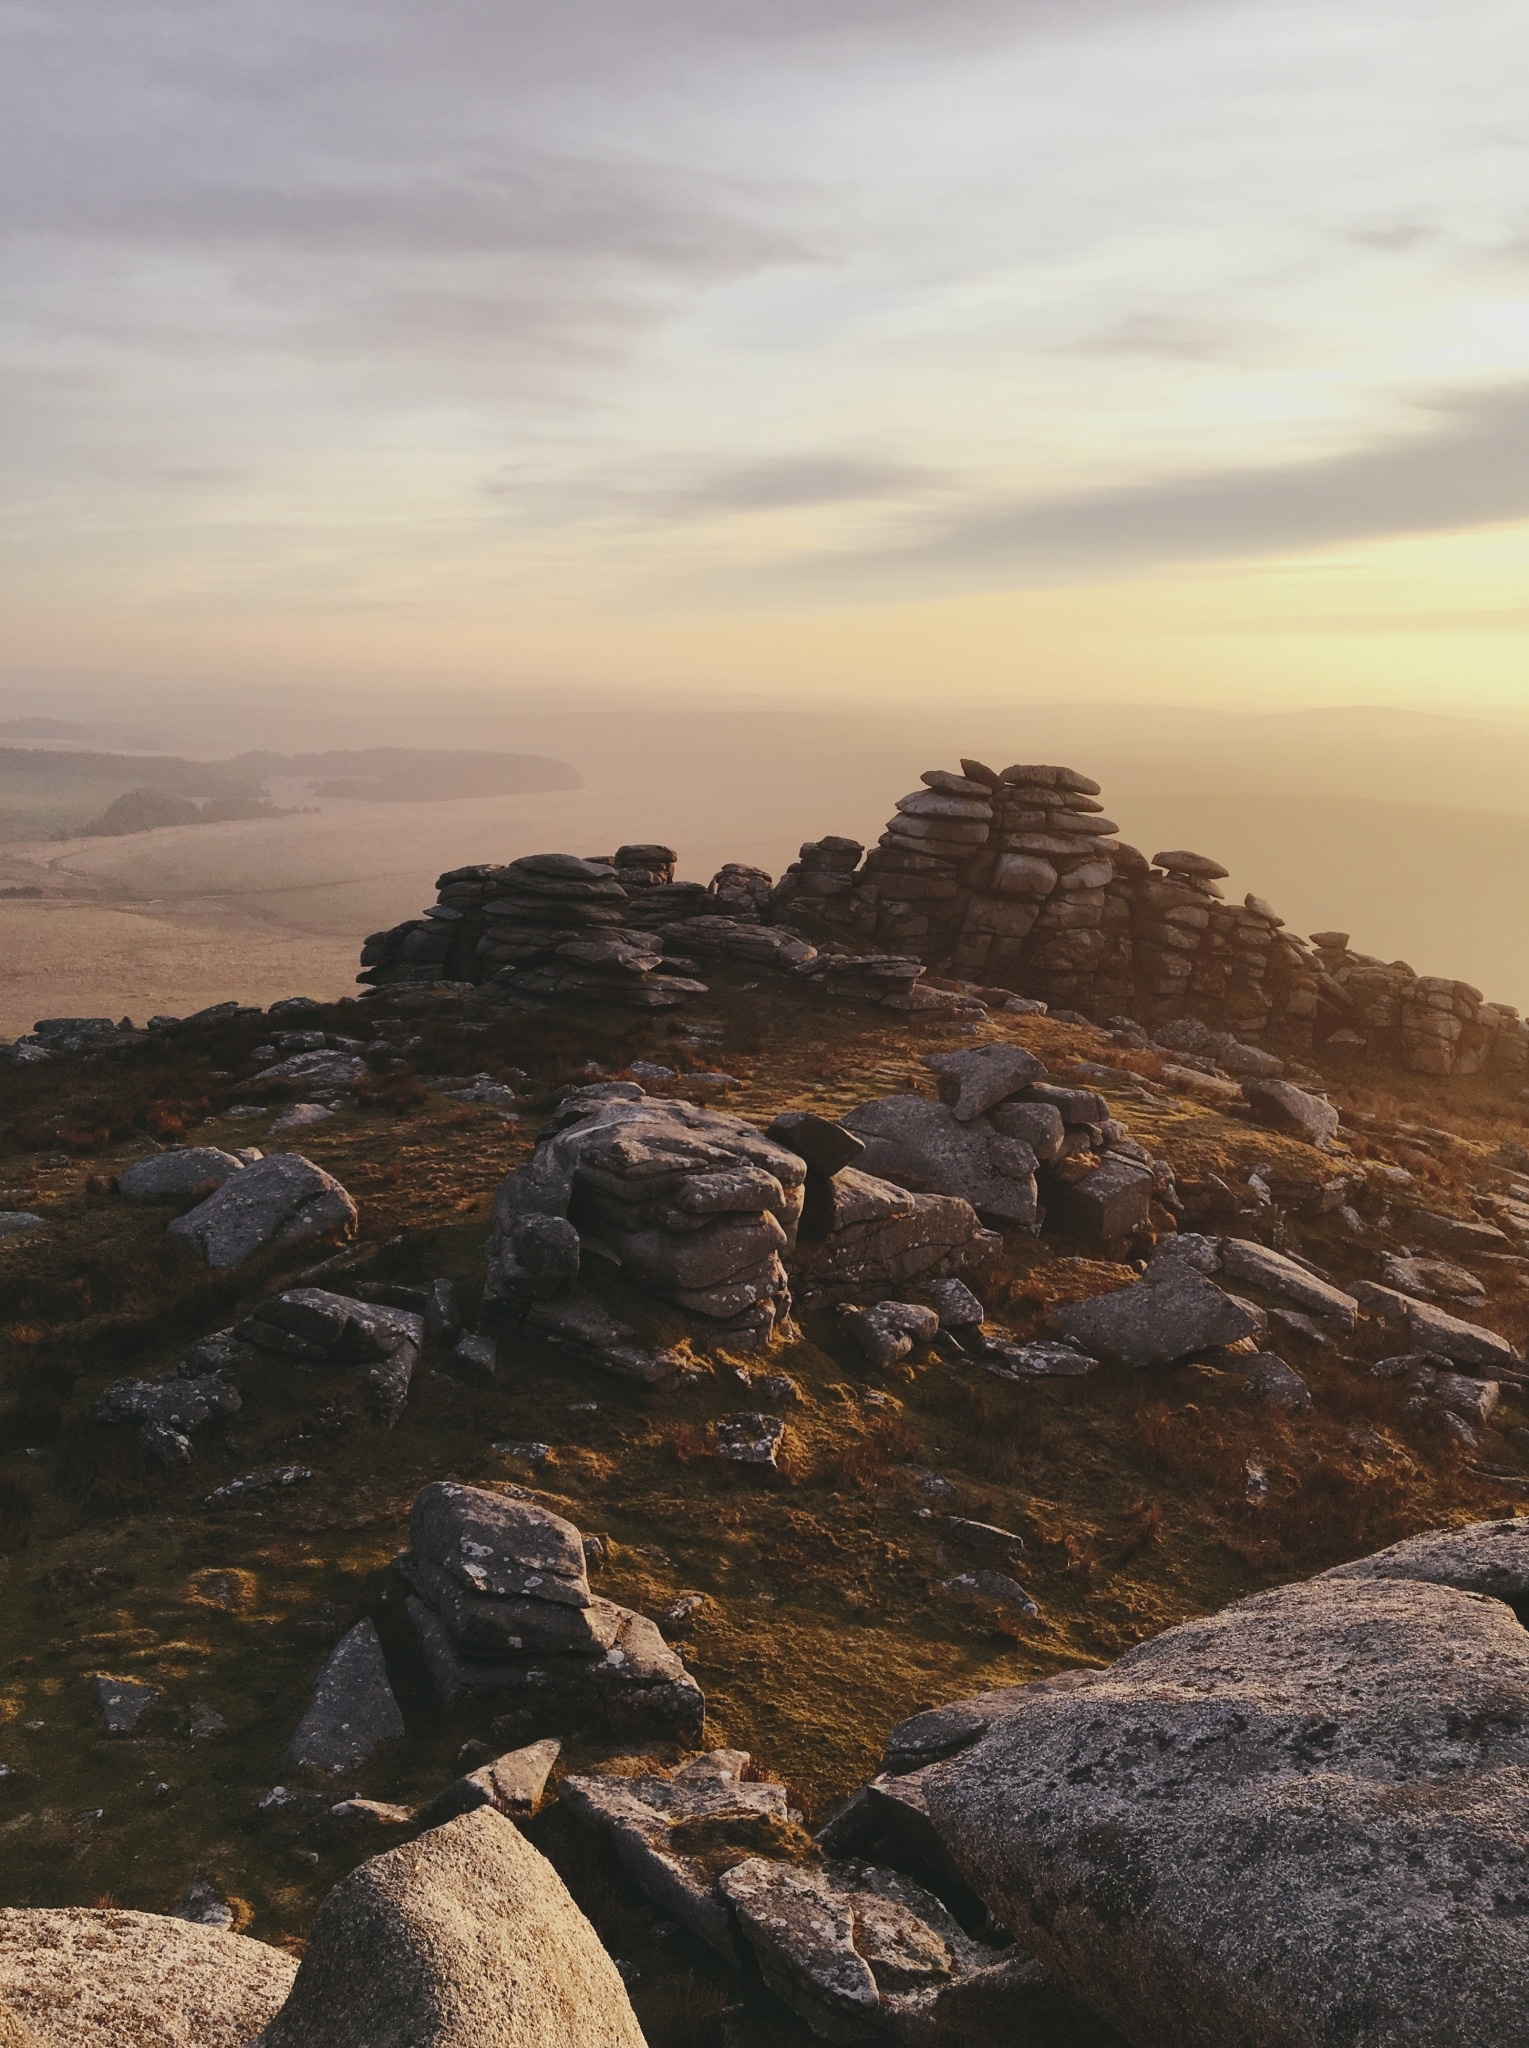
I focused on lowering the brightness of the skies to bring out colours, and lightening foregrounds to bring out colour and details lost in shadow. A lot of the tor was silhouetted from the angle that I approached from, but the dying light made circling around an unappealing process, and I figured it would prove a good challenge when it came to editing.

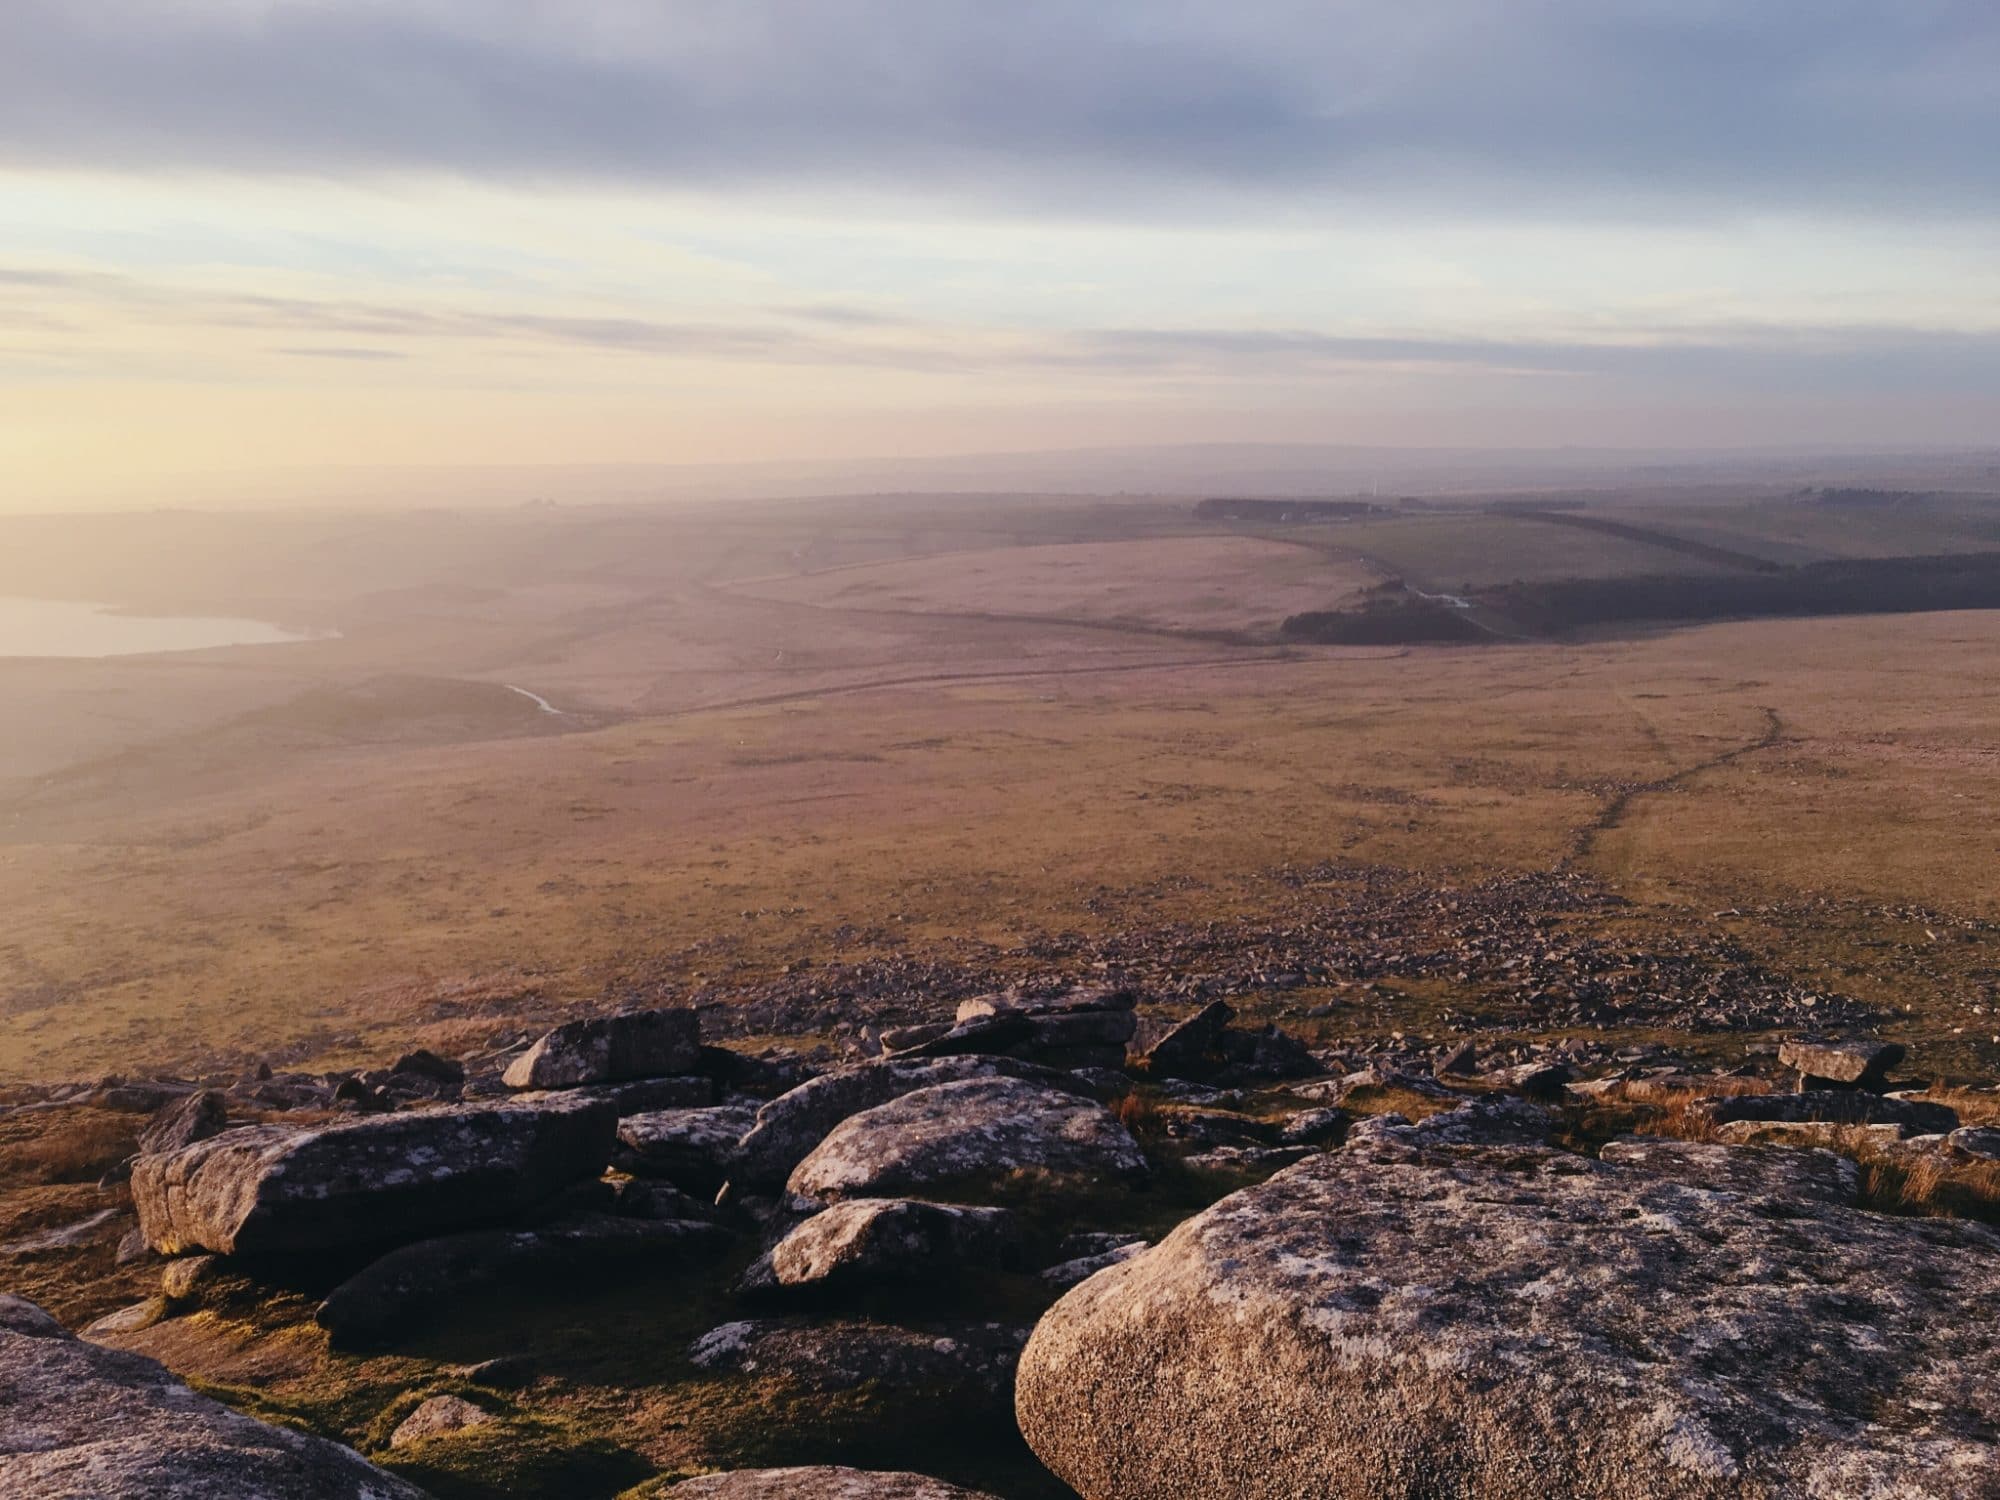
For the picture above, I raised the exposure to bring some overall light into it, and increased the contrast to deepen the shadows and lighten highlights that were now visible from the increased exposure. Restoring the colour in the sky was done by lowering highlights and whites quite dramatically, and bringing out the detail in the rocks and ground were done by darkening shadows and blacks.

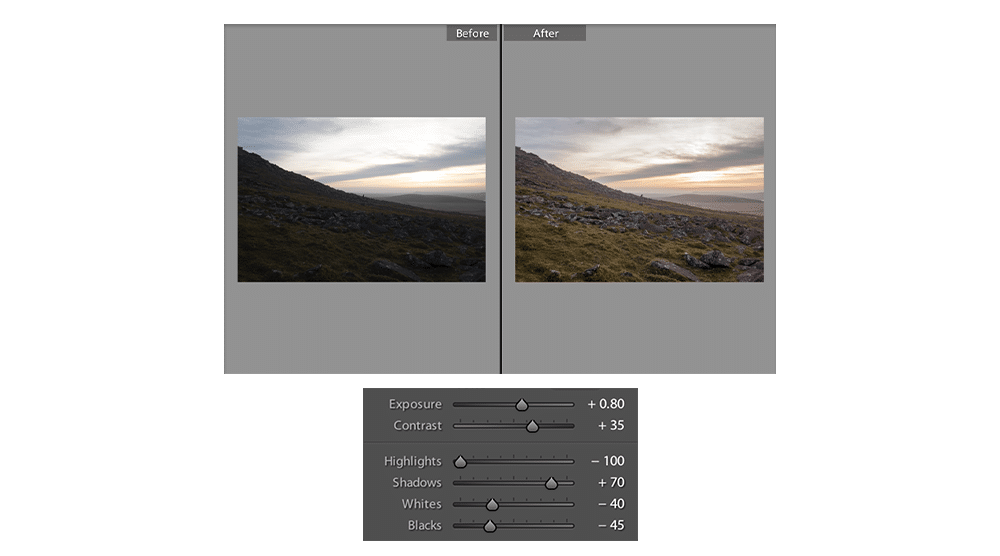
I thought the above would be an interesting one to attempt – the abrupt diagonal swoop of the landscape divides the image nicely into two halves, with a high contrast between the foreground and the sky. Again, I lowered the intensity of the highlights and enhanced the shadows to bring out the colours in the terrain.

As I got more comfortable working with shadows and highlights and contrasts and exposure, I began playing around with the colour values present in some of these pictures. I wanted to recreate that warm evening sunlight and the colours in the clouds, preserve that soft haze you can see in the landscape beyond the tor, and show where the light bounced off the granite and illuminated patches of grass and earth.

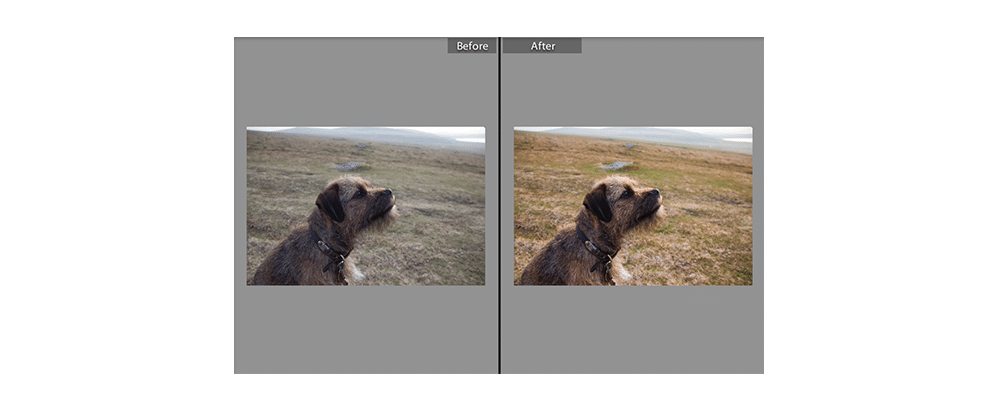
I couldn’t go through this exercise without getting a quick shot of the dashing Mr Morris, of course.

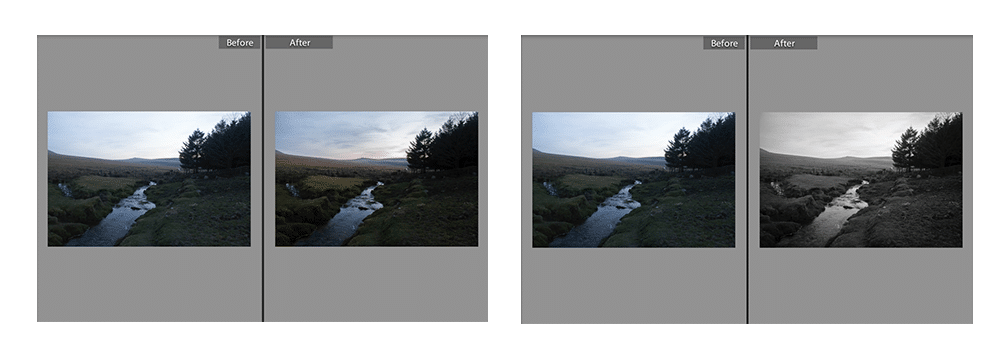
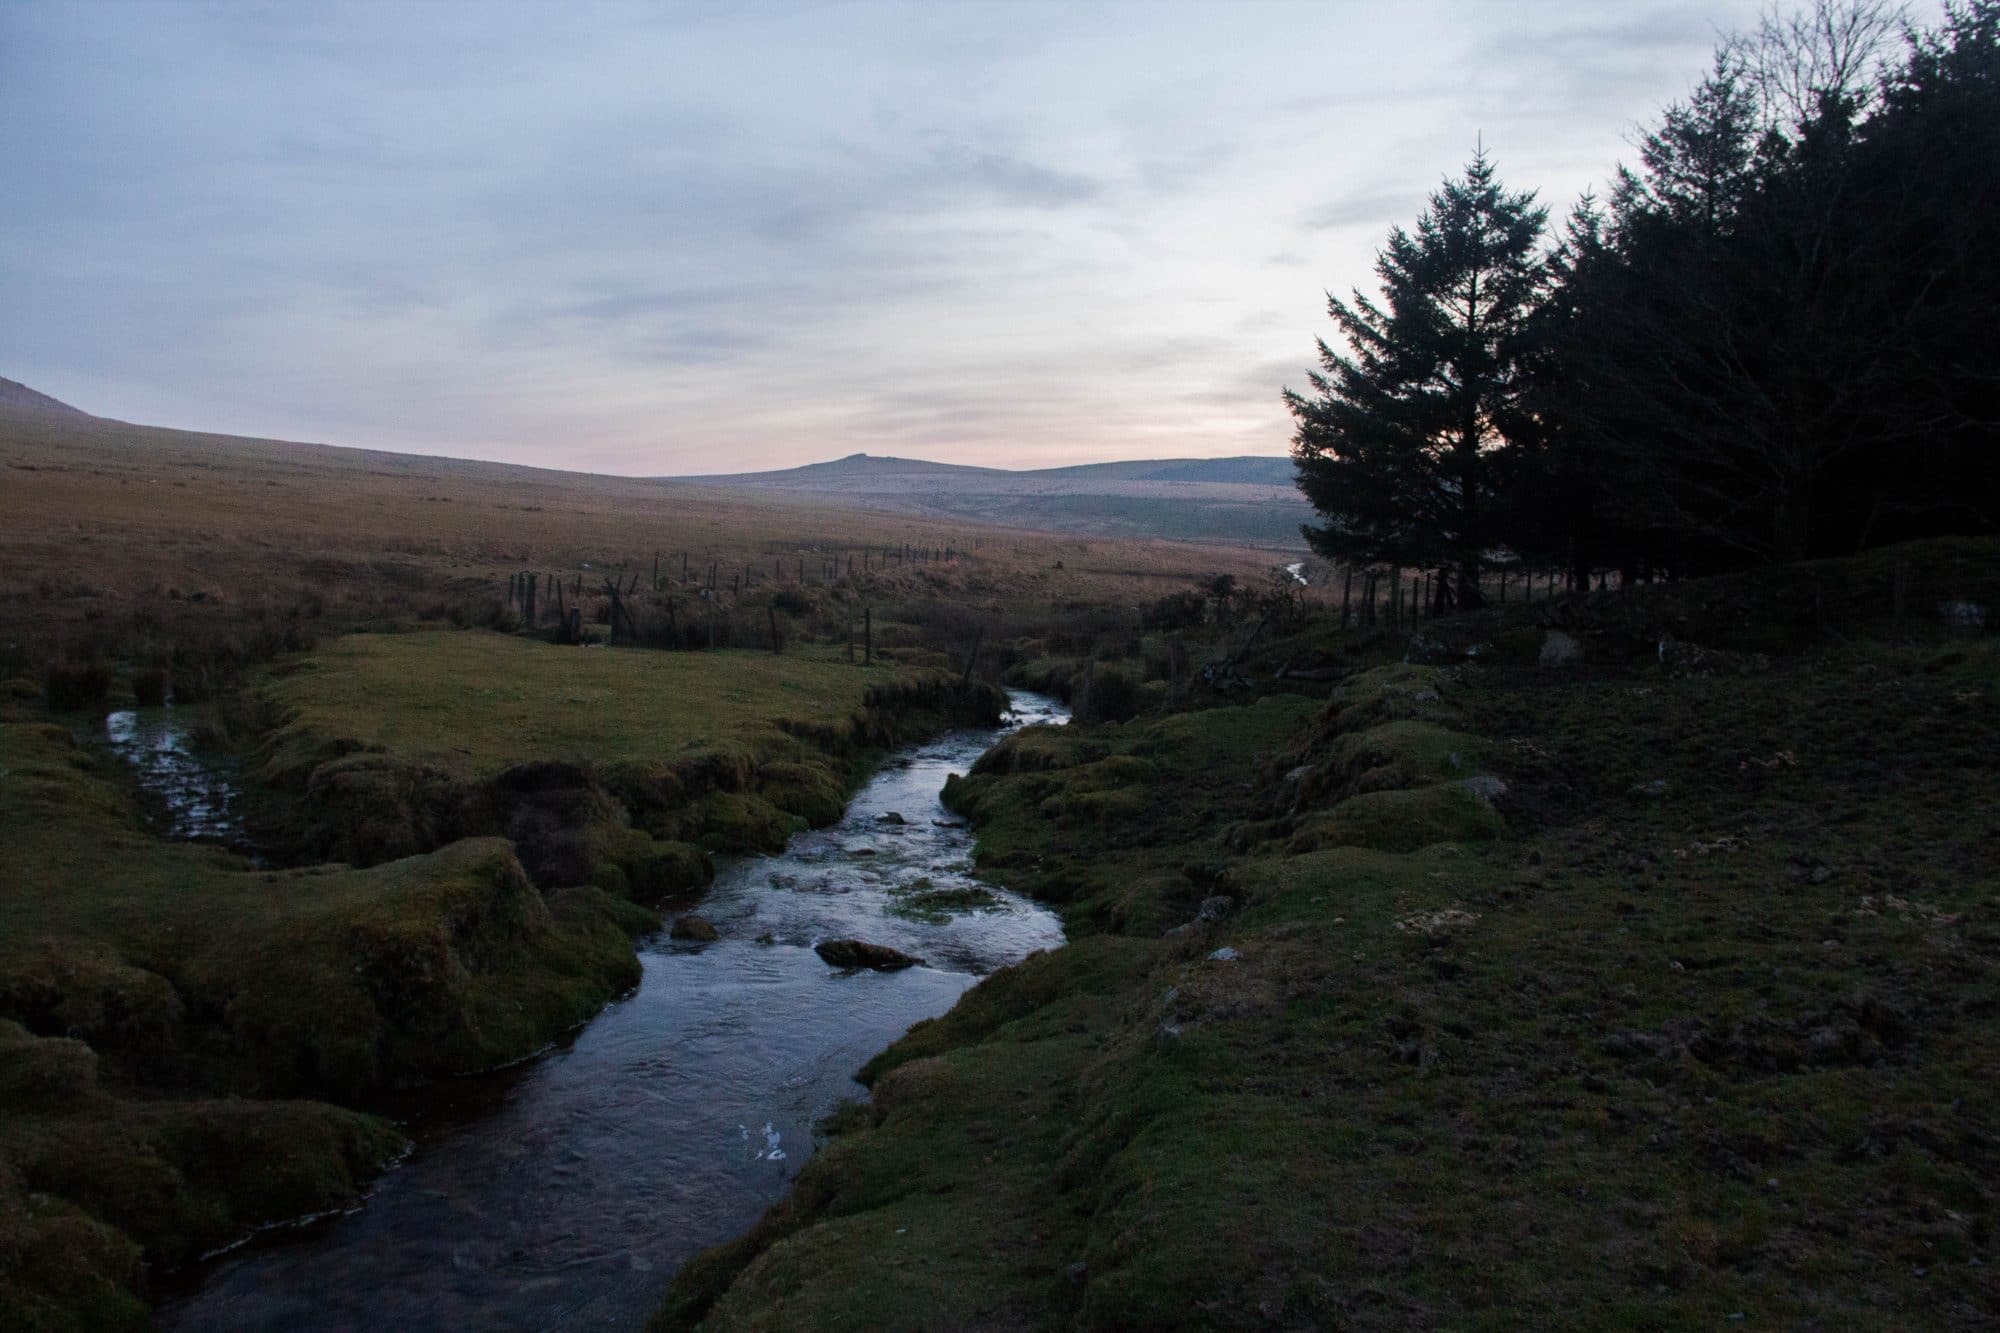
One of the last exercises was to try editing a darker image. Low-light photography has always confounded me, and it took me a while to adjust everything to accommodate. With editing the darker image, I wanted to bring out the greens and browns in the landscape that were illuminated by the last of the sunset, and once again to enhance the softness of the evening by deepening the shadows in the trees and lowering the brightness of the sky.

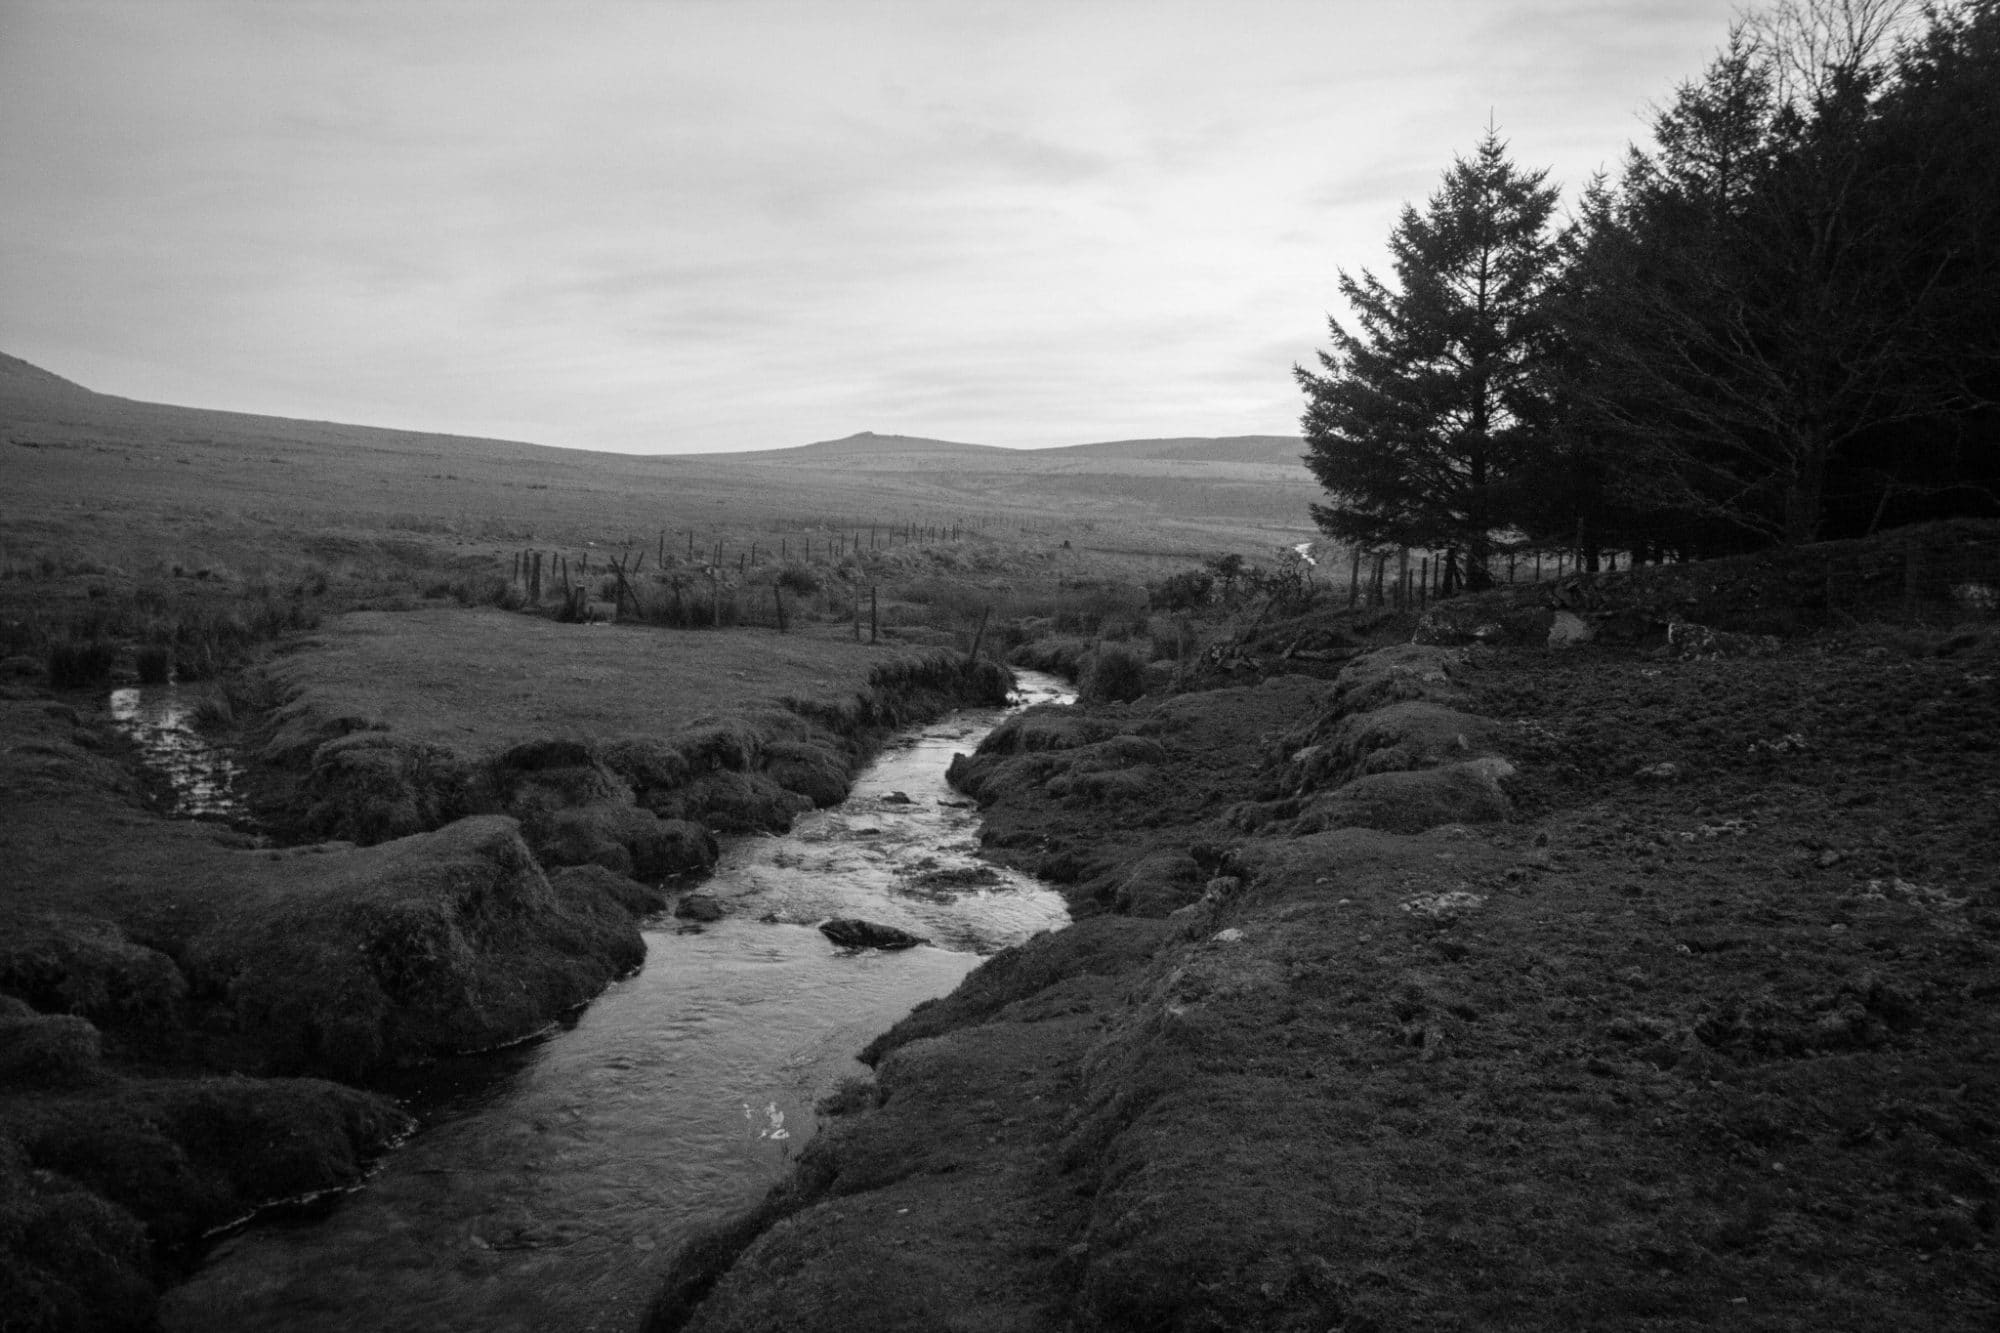
I also tried my hand at digitally recreating the look of the silver gelatin process that characterises the work of Ansel Adams. I was wary of making the image look like I’d just turned the saturation down and stopping at that, so I took extra time to play around with everything here. I wanted to make the creek look particularly silvery, dividing the dark land quite abruptly without making the contrast too stark. To do this, I raised the exposure but lowered everything else – the contrast, highlights, shadows, blacks and whites.

All in all, a constructive and positive experience. I need to understand the ins and outs of light and dark and editing and other technical photo shenanigans a lot more, but hopefully as I pursue this more in my own time, these things will come a little more naturally to me. Ten outta ten, would do again.

Here are the final images:


Happiness is the key to success

Shawn Achor: The happy secret to better work is one of my favourite TED Talks. In his hilarious, fast paced talk he explains how happiness is the key to human productivity and success.

After watching the talk several times, I went ahead and purchased his book The Happiness Advantage. Inside he discusses the 7 principles of positive psychology that fuel success and performance at work and touches on a few practical activities anyone can do to help cultivate a happy mindset.

The Happiness Advantage

We’ve probably all had a conversation in our head that goes “Once I’m successful, then I’ll be happy”, this according to Shawn Achor is backwards. By placing happiness on the other side of success we can never truly be happy. This is because once we’ve had a success, we merely change what success looks like, pushing the goalpost further towards the horizon.

Instead happiness precedes success. If we are happy in the moment our brains become charged and we become smarter. Our brains release dopamine and serotonin which not only make us happy but activates all the learning centers in our brain. With an increase in neural connections we can learn, organise and retrieve new information quickly, enabling ourselves to think faster and more creatively.

This is the premise of The Happiness Advantage. By cultivating a happy mindset we supercharge our brains, allowing us to perform at our best and lead us to success.

Cultivating a happy mindset

There are a few activities that if performed habitually over time can help us towards cultivating a happy mindset and in turn help improve our mood and raise our levels of happiness.

Meditation

Meditation helps us to slow down and clear our minds. Performed regularly it can improve our focus, make us more mindful and reduce stress and anxiety. By simply taking 5 minutes a day to close your eyes and sit with your breath will have powerful effect on your mood.

Exercise

When exercising the body releases endorphins which makes us feel happy. Any physical exercise is good, whether its walking, running, playing a team sport or even dancing, they can all help improve our mood and reduce stress. In turn we also keep ourselves fit and healthy.

Practice gratitude

Simply writing down 3 things we are grateful for every day can help to improve our happiness. Training ourselves to look for the positives in our day to day will help us to notice the smaller things in life that we may often overlook. With practice we begin to increase the number opportunities for us to be happier throughout the day by learning to appreciate the little things.

Another way to practice gratitude is to write thank you emails to those who you’re grateful for. This has a knock on effect as not only will you feel happier for writing the email, but the receiver will get a boost of happiness when they read it.

Create a positive environment

Our physical environment can have a huge impact on our mood so, if you can, try to make it one that promotes happiness. Fill your offices with plants and flowers, shower your desk with pictures of loved ones, set your desktop background to a picture of cute fluffy kittens!

Work on your strengths

We all have something we’re good at and each time we practice or use a particular strength we get a burst of positivity. Whether thats playing an instrument, sport, reading, writing, baking, singing, dancing or colouring in, it doesn’t matter what it is. If you have a skill that you know you’re good at and you enjoy, make an effort to do it every day.

Focus on your happiness and success will follow

If you integrate any of these activities into your daily life not only will you become happier, you will also begin to notice how your positivity makes your more productive and opens you up to more opportunities for success.

So what will you do to help create a positive mindset to help you achieve your greatest success?


Disclosure: I have no material relationship to any brand or person mentioned in this post.

Foraging

As part of the investment of my creativity I decided to strike out of the indoors and explore some more open spaces. Not wanting to travel too far I was able to make an attempt at foraging some edible goodness from within twenty minutes of my front door step. The aim of the exercise was to catch and cook something which was not only edible but something that someone may actually want to eat.

Foraging is searching for wild food resources.

Wikipedia

There is no such thing as a free lunch

There were two items from a book titled ‘Wild foraging in Cornwall and the Isles of Scilly’ by Rachel Lambert which I thought were realistic given my location, time scale and ability. The first was Alexanders Risotto and the second Three Cornered Leek Pesto. Spoiler Alert, I only managed one of them. Long story short, the Alexander needed for the risotto looked a bit dodgy so we decided not to risk it.

The majority of the ingredients involved in making the pesto were going to be free cutesy of Cornwall’s non urban attributes. Technically all of the ingredients could be foraged, however I challenge anyone to forage Walnuts. Or even Olive Oil. Let me know how this goes for you. Three cornered leeks ( often mistaken for Wild Garlic ) and Stinging Nettles are in abundance which is great.

Wild Food Foraging in Cornwall and the Isles of Scilly - Rachel Lambert
Three Cornered Leek

What’s really going on?

We live in a society which is overflowing with both abundance and waste at the same time. One can get pretty much any kind of food all year round from their local supermarket. I remember, not all that long ago I decided to cut out all chains. ( i.e. Tesco, Whetherspoons, Costa et al. ) Buying anything on a Sunday was a bit of a nightmare as well as some foods you simply couldn’t get without spending a fortune. I am thinking of cheese. Where would you buy your cheese from if the shop needed to have fewer than five outlets? We have all learnt to accept this way of life, but maybe we can forage back some of that seasonal satisfaction!

And then what

I should mention at this point that I had help, other than Ms Lambert’s book.

~ INTERLUDE ~

I would like to take this opportunity to introduce my guide for this outing, Nancy. Nancy is into plants. The way she got in to plants was from a very young age. The details are a bit hazy but she thinks that it started when she was given a book of flower fairies. When she would go out with her parents she started to notice the flowers from the picture books. Her parents were bird spotters, or watchers, or something. Not ‘twitchers’, though. What ever they were called, they liked to identify birds. Nancy wasn’t all that interested in looking at birds so they used to keep her entertained by helping her to identify the plant life.

~ END INTERLUDE ~

Rather than tediously regale you the reader with a run down of what happened, I am going to encourage you to go and do it for yourself. I think we would all enjoy that more.

The aftermath

Cleaning. I spent a lot of time processing everything that we gathered, washing it all a few times as well as extracting the best of what we had. The ‘cooking’ process just involved blitzing everything together. Fun fact. After gathering all the stinging nettles to your kitchen, just three minutes in boiling water will remove their sting.

During the prep we did try and work out how much of everything we were going to need and then forage accordingly. As it happens neither myself nor Nancy were great at guessing quantities and we ended up with enough pesto for about ten people. We had some for dinner, took some to the office and gave some to friends. I was pleasantly surprised by its reception actually. It was all very tasty.

Ingredients on a board
Pasta and pesto

On reflection

It shouldn’t come as much of a surprise but foraging feels a bit like hard work. Don’t get me wrong, it was a pleasure, but it wasn’t exactly a walk in the park. There is plenty out there which is edible and a variety of forageable things. You could even include fishing as part of the practice. As I touched upon earlier, some plants looked like they had gone over already and so we were not comfortable sampling them. The supermarkets have trained us out of thinking of food as seasonal which is both a shame and amazing at the same time.

I could easily imagine this to become a part of everyday life. I can imagine the monthly pesto parties where communities get together to make great vats of the stuff to share around. Could one live off of foraging? I shouldn’t think so, but I don’t think that really matters. In a society where one can buy microwavable burgers already in their buns, I think it is important that we keep hold of that connection to food in the wild.

Meet Bowie our studio DJ

We’ve been using Slack for a while at Venn and although it's been a useful tool for team communication it was time we took our chat operations to the next level. How? By building our own chat robot Bowie.

Slack is a messaging app for teams, allowing people to communicate and send important information like files, links, funny gifs and videos of cats. It also comes with a variety of apps you can add to your team to help increase productivity (and procrastination).

One particular category of extensions that caught our attention was bots, smart little programs that respond and take action based on messages you write in slack. There are lots of bots available but we’re developers, so lets hack our own.

Building Bowie

Rather than build a chat robot from scratch I took advantage of Hubot, a customisable robot made by Github.

Hubot provides you with the basic setup for a chatbot and allows you to customise it with your own cutom scripts. Following some basic tutorials, getting setup with Hubot on Heroku and working with your Slack team is pretty quick and easy. Then with a name change and avatar you have your own personalised chatbot.

bowie

Writing custom scripts for Bowie

Writing custom scripts for Bowie is just as easy. All it takes is a single file and a few lines of coffescript to setup a basic command. Just to test the water I created a simple command that would make Bowie randomly bark when the word ‘bark’ is written in a message. Here’s what the code looks like.

Running a quick test in Slack and as you can see Bowie is alive and barking!

As amusing as this script is, its not very useful. So lets take it further by allowing our chatbot to control the music in the studio.

Creating the DJ script

The idea is that we ask Bowie to play us a song using Slack, so by writing @bowie dj play lionel ritchie Bowie will search Spotify for lionel ritchie and play a song.

To get this working I created a Node app called Djay. This app will accept requests through its API, search for a track via the Spotify Web API and then play the song through the Spotify App through its Applescript API.

It might seem complicated but it can be broken down into a few simple steps:

  1. A Bowie script inteperets a Slack messages asking to play a song, something like:@bowie dj play lionel ritchie
  2. Bowie then sends an API request to our Node app called Djay with the query (lionel ritchie)
  3. Djay receives the API requests and uses the query to search the Spotify Web API for a track
  4. When a track is found, Djay takes the track information and tells the Spotify App to play that track via the Spotify Applescript API
  5. Djay will then send a message back to Bowie with the information about the new track being played
  6. Bowie then uses that information to create a Slack message to inform the team of the new track

To build the Djay app I used the following modules:

  • Express – Framework to build the API endpoints
  • Ngrok – For opening up the Djay API to the world and Bowie to send requests to
  • Spotify Applescript – For controlling the Spotify App in Node

Once the app was built I then moved onto creating the Bowie script to handle our dj requests focusing on the @bowie dj play ... command. Once finished we could now control a designated Spotify app through Slack using Bowie, heres the result.

With all the difficult work out the way I took things further by adding a few more commands. Heres the entire list of dj commands available with Bowie.

  • dj play <search> – Play a track via the <search> parameter
  • dj any <search> – Play a random track via <search> parameter
  • dj now – See whats currently playing
  • dj volume <volume> – Set the volume up, down or 0-100
  • dj next – Play the next track
  • dj previous – Play the previous track
  • dj pause – Pause the current track
  • dj resume – Resume the current track

Now we have our own personal chatbot at work, who barks and controls the music in the studio. Needless to say, this set up is a huge success with the team and has us all dancing on the ceiling!

Somewhere over the rainbow…

I’ve just made the best cake ever. Take a seat and i'll tell you about it.

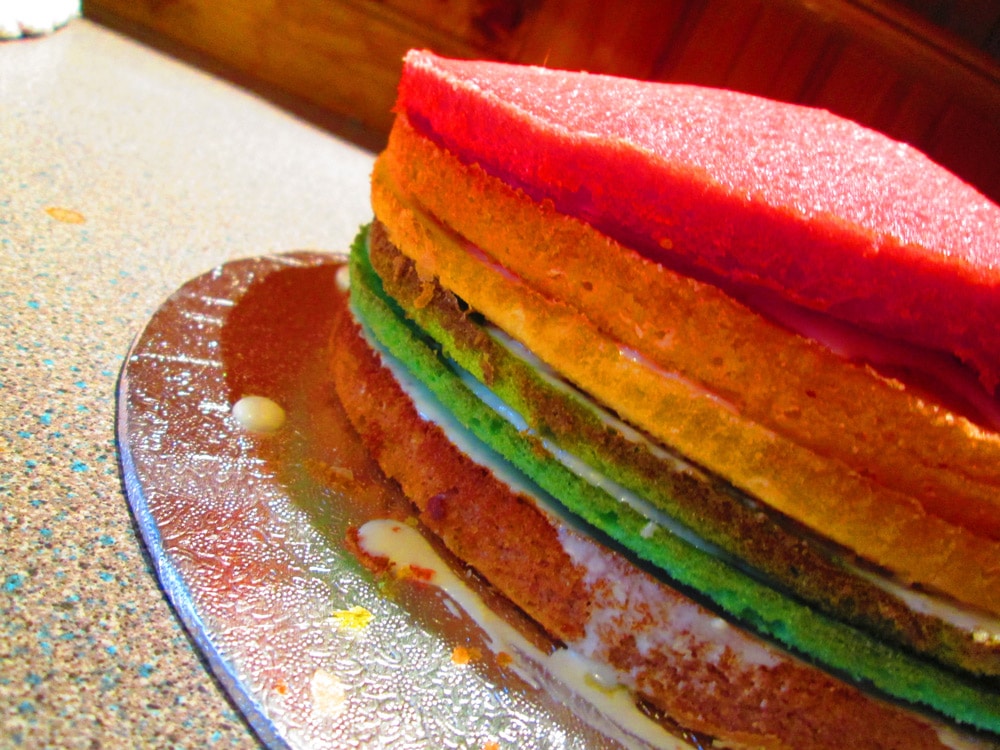
I’m not saying I’m the greatest chef in the world or anything – but I surprise myself. I have made the best cake in the world – perhaps even the universe. They will sing songs of my brilliance for years to come.

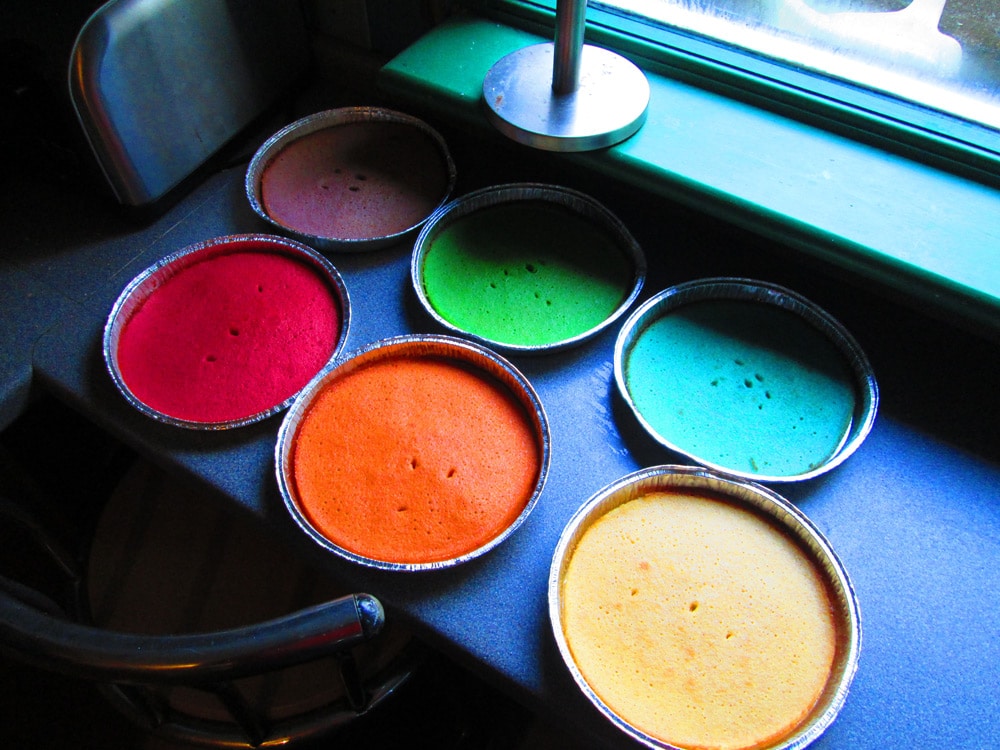
I’ve made a rainbow cake. That’s cooking lingo for ‘cake of many colours’. Let me tell you something – before I made this cake I was a wanderer with no direction, now I have a purpose in my life – you wouldn’t understand. Now that I can safely say that I’m a fully trained Grade-A chef, my team-mates here will be thrilled at the culinary delights I’m going to be making in the future, every Monday – no, every weekday will be a cake day.

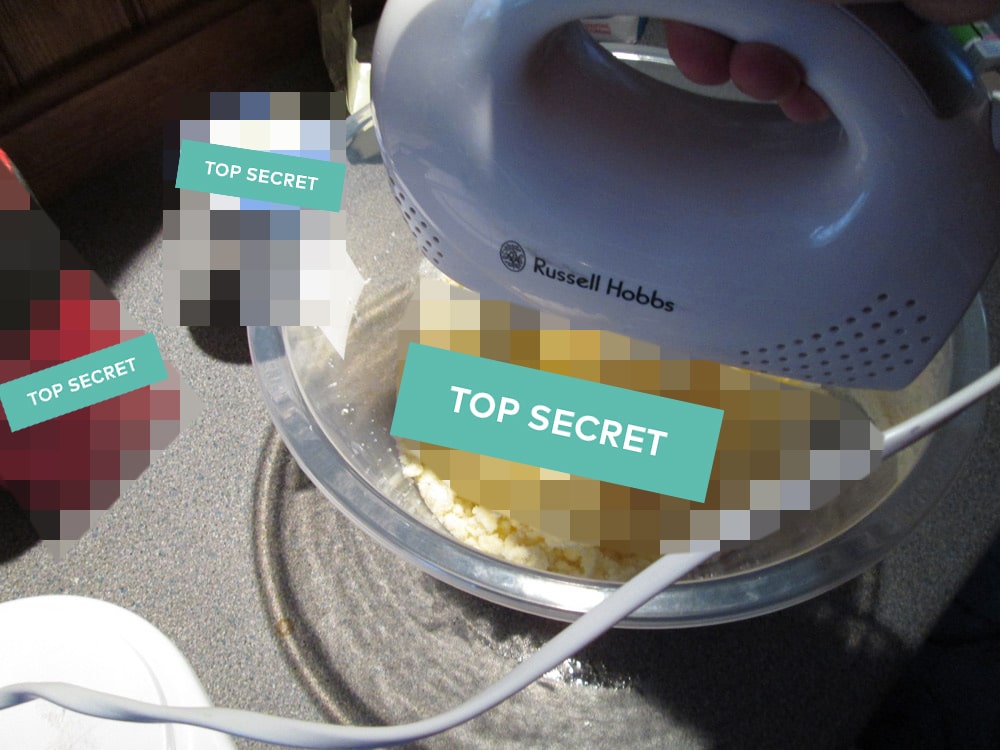
I’ll keep it simple for you – I bought the ingredients from a shop and mixed them together – in a bowl. I won’t tell you the recipe because I’m going to have to license it. I could go on Dragons Den with it – It’s a money spinner.


IMG_26702


IMG_2675


IMG_2676


Here’s what my colleagues thought of my magnificence…

The consistency is a bit… yeah.

– Joe Grainger

I don’t like your cake.

– Zander Grinfeld

10 out of 10… for effort.

– Andy Hurtel-Hymans.


Nonsense. I’ll prove it.


blog03-iss

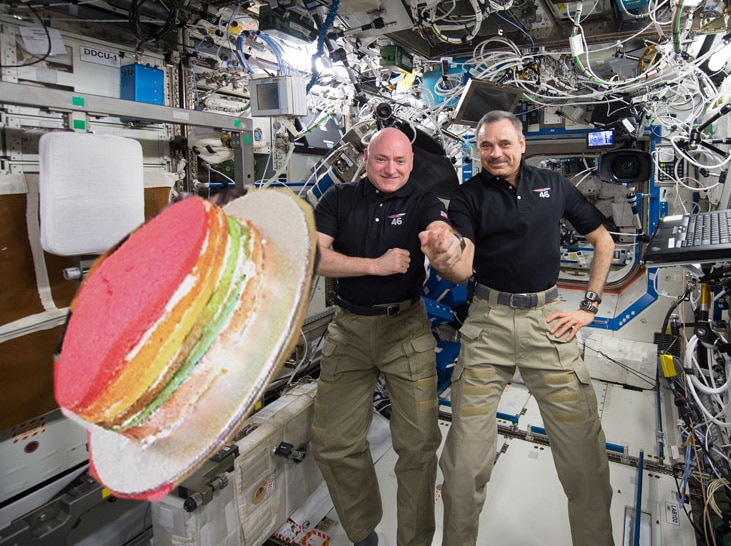
My cake was recently launched into space to feed the astronauts on the International Space Station – and they loved it! You gotta spread this cake around it can’t stay on Earth – that’s selfish.

You can’t argue with that can you. I’m going to ignore the comments of my team mates, they must have been talking about a different cake.


Photo-credits
NASA 2016

Building a game with Node.js

As developers it can be difficult to find opportunities to trial new technologies. I've dabbled with Node.js before but really wanted to get a project going that I could sink my teeth into. So for my feed I decided to make a multiplayer game for the browser.

With only a day to build it I felt I would be better off attempting to replicate an existing game. The focus of my feed was to play around with node not to try and create a brand new game from scratch. During my research I stumbled across a game built with node called Rawkets. With blog posts and talks about the development of the game readily available, it helped give me a kick start in building mine.

Leaderboard: Space Shooter Game

The concept of Leaderboard is quite simple. Each player has a spaceship they control and fly within a restricted space. The aim is to shoot and destroy other players to score points. The points you score grow exponentially, so the more kills you get without dying the more points you earn. At the end of the game the player with the highest score wins.

Building the game

Leaderboard is an online browser based multiplayer space shooter game. By building a browser based game I was working with familiar technologies such as javascript and html, but also some unfamiliar ones too:

  • Node.js – server side javascript
  • Socket.io – web sockets for realtime communication between browser and server
  • MongoDB – for data storage
  • HTML5 Canvas – for game display and graphics

Overall the development went quite smoothly, except for times where I had to remind myself of things I learnt in maths class back in school. But by the end of the day I had a fully working, though incomplete, game.

There’s more to come

With only a day I wasn’t able to complete the game in its entirety, so there’s plenty more I’d like to work on:

  • Use MongoDB to save player scores
  • Authenticate users with Twitter
  • Work on Player movement and acceleration
  • Add game audio
  • Add touch controls
  • Improve socket messages
  • Add health rather than 1 hit kills
  • Create a better name
  • General code refactor and tidy

I really enjoyed working on this project, it was a nice escape and interesting working with something new. I plan to keep working on the game whenever I can so keep an eye out for the next update.

A Portrait of an Ex-Artist

I can’t draw faces. It’s the reason I have no confidence in my illustration ability. It's also the reason I thought I'd never be a real artist and dropped out of a sculpture course to pursue design at the eleventh hour, which makes it indirectly the reason I became a designer. So, after a 18 year hiatus of making a decent attempt, I thought now was a good time to re-face the challenge.

When I do draw a face it ends up one of three ways:

  • I start drawing, and after about a minute I look at what I’ve done. I can already see it’s awful and has no hope of forming into something recognisable, so I quickly try to turn it into a picture of something else… a dog, a lighthouse, anything – just in case someone else sees what I was trying to achieve and laughs or cries or something.
  • I follow it through and see it to the bitter end. The result is a strange house-of-mirrors creation. Elongated or mutated like some plastic surgery mishap or Christopher Lloyd after he’s been flattened in Roger Rabbit. I quickly annihilate the paper lest it be seen.
  • It’s a cartoony face. That’s ok – I can do that, but that’s not the point – it’s not a real face.

It extends to pretty much any drawing of ‘real’ things – but it’s never so obvious as in a face. When I try to draw a portrait I always give up before I’m finished, at a point when the picture looks pretty awful.

So it was with fascination that I watched Sky Arts’ National Portrait Artist of the Year. It’s a simple premise that’s enthralling to watch. A group of artists all paint the same subject. From our armchair we can watch how various, uniquely talented individuals create from nothing – each with their own method and wildly varying outcomes.

Design (what I do) is a controlled type of creativity – creativity within constraints. Painting, fine art, sculpture is freedom of creativity. These artists on the telly live in a world without goals, targets or boundaries – it’s a blank canvas, an open road.

Sure, some of their portraits were total crap – but that’s part of the beauty of it. Art is subjective, without criteria for success. In short, art is for it’s own sake, design is for purpose. Watching this array of artists do whatever–the-hell-they-wanted made me want a piece of that liberation, so I decided to take a dive in at the deep end and paint a portrait.
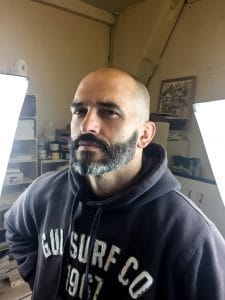
painting-1I decided to paint Andy – he’s got a pretty angular head, which suits the style I wanted to go for – a kind of angular, palette knife approach favoured by the insanely talented winner of Season 2, Christian Hook.

I opted for acrylics, mainly because I probably would get in trouble if the lounge stank of linseed oil for a month. My plan was as follows: first do some sketches. Hopefully one will look something like a real human. Even better if that human was Andy. Then I’d paint a study. I got a tiny canvas free with a larger one – which I decided would be a good thing to practice using the paints on, make some mistakes and learn the skills I needed to take on my final challenge; a two by two foot canvas. My only hope was that it looked something like a real person. Artistic flair would be a bonus.
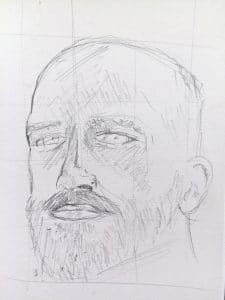
painting-2Things started pretty well. I drew a god-awful freehand sketch of some long-headed freak, but my follow-up drawn using an overlaid grid was pretty good. It looked like Andy. After another, more stylised sketch which was a step in the wrong direction I decided to tackle the test canvas.

I started again with a sketch, just the eyes for this one. I then painted the canvas red because I’d seen some people do it on the telly. I didn’t really know why at the time – but in retrospect it kind of helps to tie the painting together, and enables you to really see what you’re painting – skin colour on white is a bit of a hard thing to visually parse.

My first go was a bit of a brown mess, things got muddy fast. My palette was shades swamp and the painting not much better. It actually turned out to be a good move using acrylic – I scraped a load off and started again, working freely over the paint which had already dried enough to be re-worked. This time I mixed just a few key colours on the palette.


painting-4At some point in the next hour of painting, scraping, painting, scraping – a couple of things happened. Firstly it occurred to me that I’d barely finish the study in my feed day, let alone the main portrait. I’d have to make the little one as good as it can be. The second was a little more… profound I guess. Something clicked. I started to be able to feel the paint building the face. It became less important what was on the canvas in front of me, and more important how what I was doing related to what had gone before and what would come next. Directions of the brush created planes of the face – tiny specks of colour transformed the appearance of the whole eye or cheek or nose.

Most crucially, I totally gave up on each stroke needing to be the one that makes the portrait look finished.

In design I’m used to the final product coming from a long and detailed process. The early stages don’t give you the finished picture, instead an outline of what the project is, how the outcome will take shape. Slowly, through that process you move inexorably towards the outcome, and it’s only right at the end that it can potentially become recognised by everyone as something special.

painting-3

And I think that’s where I’d gone wrong all those times drawing faces before. I’d always put pressure on myself with drawing to be able to put a few marks down and to have created something magical. Some people can do that, sure, but clearly not me.

In fact, like design, painting can be a series of processes. You have the micro process of building up that painting from something basic and unformed to something finished and beautiful. You have the macro process of developing your own style – figuring out how you attack the canvas, what your method of interpreting the world is.

As it turned out, I’m pretty pleased with the painting. It’s kind of what I hoped it would be and certainly better than I thought It might be. Don’t get me wrong – I can see it’s no masterpiece… but for me it was the process that was most satisfying.

painting-

If I did the painting again I’d approach it totally differently. I’d still start with a sketch, but then I’d not even bother trying to make a face – instead I’d figure out shapes and colours, safe in the knowledge that towards the end I could bring in the detail and marks that make it ‘real’. If I carried on, making painting after painting for years my process would develop into something I could trust to get the picture where it needed to go, without worrying about what it looks like when it’s only halfway there.

Painting a portrait is very different from my day-to-day design work, but not entirely in the way I’d expected. In design the outcome is everything – brief, goals and objectives are measurements of success – characteristics that aren’t always considered when approaching a canvas. However the beating heart of both is the same. Create something beautiful, and find your own way of doing it. Once you know your process, trust it, enjoy it. Don’t expect immediate results – be patient and good things will come.



Tidy desk, tidy mind

Tidy desk, tidy mind is one train of thought. The other is empty desk, empty mind. What does that even mean? Empty mind, as in there's nothing going on in there or it's been cleared out for you to fill it with loads of creative ideas and mind blowing revelations?

My last feed involved me clearing out our back room/kitchen/photography studio/?/?/? It was something that I had been wanting to do for a really long time without actually wanting to do it, if you know what I mean. The reason it took so long, honestly, was because I knew what lay ahead. Lots of soul searching, memories, the odd tear and loads of sneezing – I’m not good with dust.

As time had gone on it had filled up with all kinds of stuff; samples, old discs, envelopes and boxes in odd sizes, various stationery bits and bobs and lots of other things that I didn’t even know were in there. I know that it’s wrong but I just can’t help thinking to myself that we might need it all one day. I tell myself that it will be in the not too distant future. In reality it ends up being a couple of years (if at all), even then it’s a case of do we really want to use that in its current state? The answer (after spending time finding the little piece of treasure that you’ve hidden away for a rainy day) invariably is no..

There are various methods that can be used for de-cluttering missions.


The Gung-Ho Method™

Step 1. Enter said room knowing that none of this stuff has been used for a few years now.

Step 2. Throw that stuff away and forget about it.

There are obviously big risks doing it this way, for me anyway. If you do choose to use this method then you can’t have any sneeky peeks into boxes, as soon as you spot something that you had forgotten all about, that’s it – you enter the rabbit hole of flipping through the book, leafing through the leaflet, trying to sharpen the old snapped pencils…

When I did my feed – that’s what I tried to do… I failed. I went through everything, piece by piece to make sure that I wasn’t getting rid of any treasure. You never know, there could be a winning lottery ticket in there, a family photo or better still an uneaten humbug. Every item was evaluated;  what is it, how long have we had it, will it be used again, is anyone likely to ask to see it again and most important of all, will it keep me up at night knowing that I’ve taken it to the recycling depot and just left it, all alone, never to be seen again?

It was emotional.

It was a great success in so much as I managed to clear out a lot of old things that probably should have ‘left the building’ many moons ago. It was Sod’s Law there were a couple of things that were actually asked for a few days after I put them on the chopping block. Did I mention that it took all day?

I have since seen #minsgame  which is publicised by the minimalists who are all about cleansing yourself of clutter.


MinsGame

Day 1: Get rid of one item by either throwing it away, giving it away or selling it.

Day 2: Do the same with two items.  

Day 3: And again with three…

…and so on and so forth. For a whole month. Maybe a good start if you find it difficult to part with those ‘saved for a rainy day’ items. I wouldn’t be able to follow this method though. It all seems a bit drawn out for my liking. I think I would need to skip to day 10 at least. It also involves commitment to the cause i.e. de-clutter everyday for a whole month… no thank you.


So I suppose that at the end of the day we had a clutter free room which is now being put to good use and there was a sense of achievement. I can already see a few bits of collateral making their way back in there though. This is where I’m supposed to say that I’m in the ‘Tidy Desk, Tidy Mind’ camp now, I am converted and will forever more be Mr. Tidy. That’s not the case. I never have been, and as much as I try, I never will be. I like a bit of variety in my life and a bit of excitement. Expect the unexpected. What’s more exciting than going through a pile of papers at the end of your desk or rummaging through your draws and stumbling upon that thing that might just spark the making of the next great idea.


Mishaps in Screen Printing

For my first ever feed in my entire life I wanted to spend an entire work-day screen printing. I bought some t-shirts, borrowed a screen-printing kit and bought some biscuits (it's a feed after all). Here’s what happened.

Full disclosure, the results aren’t the best – maybe you can avoid my mistakes if this is your first time – If you’ve already done it all before you won’t learn anything so why not free up a weekend and read Andy’s post on watercolours – it’ll be far more interesting.

What you’ll need

For those of you who have stuck around – there are some things you’ll need.

blog-01

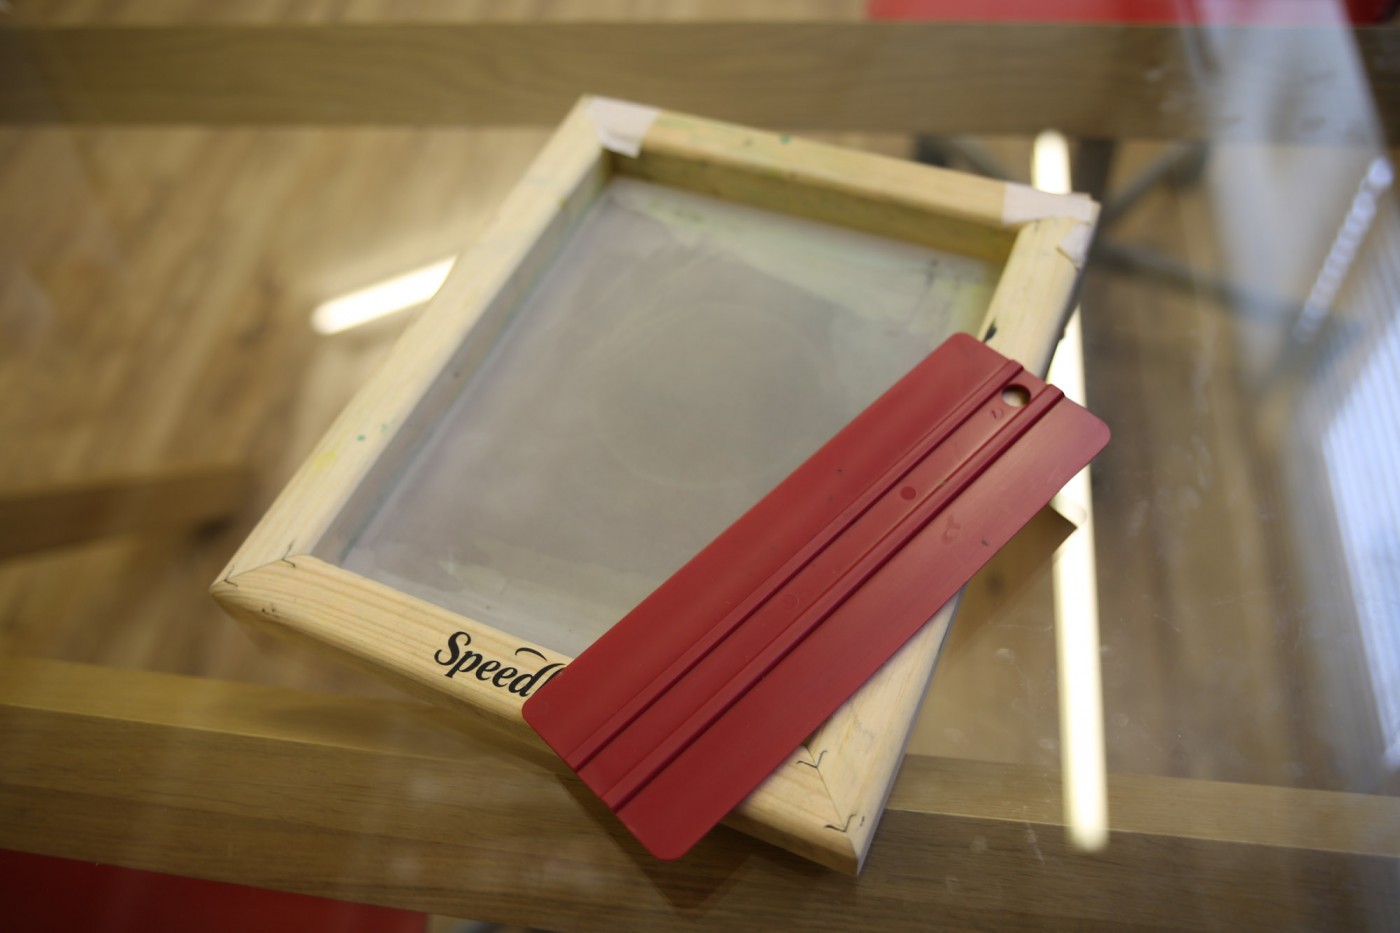
A basic screen printing kit. This Speedball one is great, it has the screen, a squeegee wotsit, some fabric paint and a scalpel.

Something to print on

Some acetate (OHP paper) to make the stencil

Masking Tape

Biscuits


Printing

All you’re doing is pushing paint through a membrane… sometimes – you can choose where it goes through and where it doesn’t in a couple of ways.

The simplest way is to cut a stencil out of acetate and stick it to the back of the screen. The acetate will stop the paint going through – you don’t use paper or card because it would get soggy.

The more involved way is to apply a photo-emulsion to the screen. An image is then transferred to the emulsion by shinning a bright light onto it. Dark areas stop the emulsion from setting allowing it to be washed out, areas light hits sets the emulsion within the screen and will stop the paint getting through. Take a look here to see this.

blog-01-3It did a bit of experimentation to see how my stencils were going to look. I cut multiple stencils for each design which I could print one on top of the other.

blog-01-7

To begin – stick a piece of card inside the shirt to stop paint bleeding through onto the back-side!

blog-01-2

Stick your stencil to the back of the screen. Be sure to seal the edges with tape, you don’t want paint finding its way out of there, otherwise you’ll have a screen shaped square around your design.

blog-01-8

Before you put the screen onto your shirt lay a bead of paint onto the screen and then ‘load the screen’. Push the paint with your squeegee at a 45 degree angle up the screen – to spread and even layer of colour across it – like putting jam on a sandwich. My photo doesn’t show the paint because I’m doing this a bit like Blue Peter (Here’s one I made earlier)

blog-01-4

Carefully lay your screen onto your shirt – don’t move it around once you’ve put it down!

Do the same squeegee action again to transfer the paint onto the shirt. Press reasonably firmly.

Lift your screen carefully – in one direction, try not to twist it.

blog-01-9

Oops – looks rather shabby. The bubbling effect in the yellow text is caused by the paint being lifted off of the t-shirt by the screen – this was because of a gap between the screen and the shirt. Oh and the blurred look is because I slipped. The other two layers are OK, The blue circle has an edge like that because of not pulling the paint all the way to the edge – but I kind of like that.

The bubbling can also happen when your lift your screen but your shirt sticks to it! I’ve seen some screen-printers have a table with holes in that suck down what you’re printing onto – sort of like a reverse air hockey table.

After making a bit of a mess of that, I secured my screen a little better and made sure to have no gap between the screen and the shirt. It turned out a little better this time…

blog-01-6

What do you think?

My attempts aren’t as good as I’d like – but that’s how it is when you start – You can’t get good at something without having a few mishaps along the way – it’s all part of the process. If you’re interested in this sort of thing give it a go, take your time and embrace the mistakes.

blog-01-10

Watercolours – that looks easy!

A day away from work relaxing with a set of watercolours sounded like a great idea for my feed. I had done a bit of acrylic painting but hadn't done any watercolour before, not that I can remember anyway.

2015-04-24-14.29.41

Tools of the trade

Brushes – As it turned out you need a good selection of brushes if you want to do things properly, it’s quite daunting how many different types there are and each with their own use and merit.  When doing my research I noted a debate about whether natural brushes rule over synthetic brushes. As a beginner on a budget I went for the synthetic brushes buying a starter pack of basic brushes which as the pack told me was all I would need a beginner (at this stage that’s exactly what I was). As it turns out synthetic brushes tend to hold their shape better and don’t absorb as much water as a natural brush giving you more control (can’t be sure of that as I never used a natural brush though).

2015-11-11-15.59.50

Paints – Just add water! There is the customary watercolour set that has the swatch circular colours that are dry and you just add water – pretty sure that everyone has had a go at one time or another during their childhood. Although I was a beginner I saw myself needing to step up a bit so I went for the tube water colours which I thought was a bit more exciting and also easier for mixing. At least I thought so. As for the colours it was recommended that as a beginner your palette should ‘balance warm colours with cool’. Some of the colours suggested for a beginner’s pallet had ridiculous names like Hooker’s Green and Vandyke Brown. In total it was suggested that I start with 10 colours each with unique names. I would say that as a beginner who is likely to carry on and do watercolours regularly, go for it. I however knew that I could make up any colour with red, blue, yellow. There I have revealed my secret which I have kept since I was 4! It might take you a while to get the colour right that you want but if your are stuck without the beginners pallet of 10, it’s not the end of the world. On my way out I spotted some watercolour pencils which I thought I would give a go as well. Not really used by purists and you don’t really get the same finish but I wanted to give them a go as well.

apple_water

Paper – Being involved in print for more years than I can remember I know that the variety of paper stock on the market is phenomenal, there is a stock for every occasion. Not quite the same variety in watercolour paper and as I was still a beginner, for the rest of the day at least, I went for a watercolour pad containing cold press paper which has a slightly bumpy texture. I did read that if you are using loose sheets they should be at least 300gsm otherwise they will start to curl. This did happen on a few sheets where I applied too much water. Hardcore watercolour specialists will stretch their paper. This basically involves you soaking your sheet of paper in a bathtub for about 5 -10 minutes, placing it on a hard board and use the gum tape to stick it down. Leave it to dry and paint away. No need to worry about how wet your paints are then.

Other bits –  A waterpot, kitchen roll (great for spills, picking paint up off the page if you’re over zealous and can also create textures by dabbing onto the wet paint), a palette (I used a frisbee found at home, the joy of having children around) and a hairdryer, something I very rarely use! This isn’t essential but can speed things up! If you do use the hairdryer it does change the result, ideally you’ll have loads of time on your hands and allow the paint to dry on it’s own.

spider_2

Preparation, preparation, preparation!

The first thing I thought I would do was to watch a few tutorials, it’s only watercolours after all and can’t be that hard. This is where I experienced my first decision for the day, which tutorial to watch. There were so many, each with their own style and technique and, depending on the chosen subject matter and nationality, they were different again. So, I decided I would spend the next couple of hours watching a variety of styles and techniques and give it a go as I went along.

WOW! Back to my comment about ‘how hard could it be?’… easy to slap paint on the paper not so easy to get a ‘watercolour’ result. Unlike other medium where you can change and redo things as you go along, basically with watercolours you need to plan it out and whatever marks you make are there for good.  There are ways of ‘removing’ mistakes but it needs to be done quickly and you can never really undo what you did totally. What I mean by that is you will never get back to the white paper look.

eye

Choose your subject matter – This is kind of important. When embarking on doing a watercolour you need something to paint. To start with I just practiced brush strokes, with lots of water, with less water, with a dry brush, sponge, you name it I gave it a go and it was loads of fun. None of it looked like it did in the tutorials (apart from some of the colours) but hey ho it’s all about the experience.

trees

I won’t go into all of the different techniques to use but basically each one gives you a different result. In summary you can use wet-on-wet which is what is says, applying wet paint to a wet background. You do lose a bit of control and you need to do things quickly using this technique but you can get some great results. Next one up is wet-on-dry which, yes you guessed it, is wet paint on dry paper. You have more control and are able to have a sharp edge. The last one is dry brush which is great for adding detail. Your brush needs to be just wet enough to take on the paint and gives you loads of control.

IMG_0920

One thing I should point out is that if you are mixing your colours as you go, if you ever need to cover a large area of paper with a wash, it’s better to mix too much than too little. The last thing you want to do is run out and have to mix that crazy colour that you created. Guaranteed it won’t be the same second time round.

IMG_0253

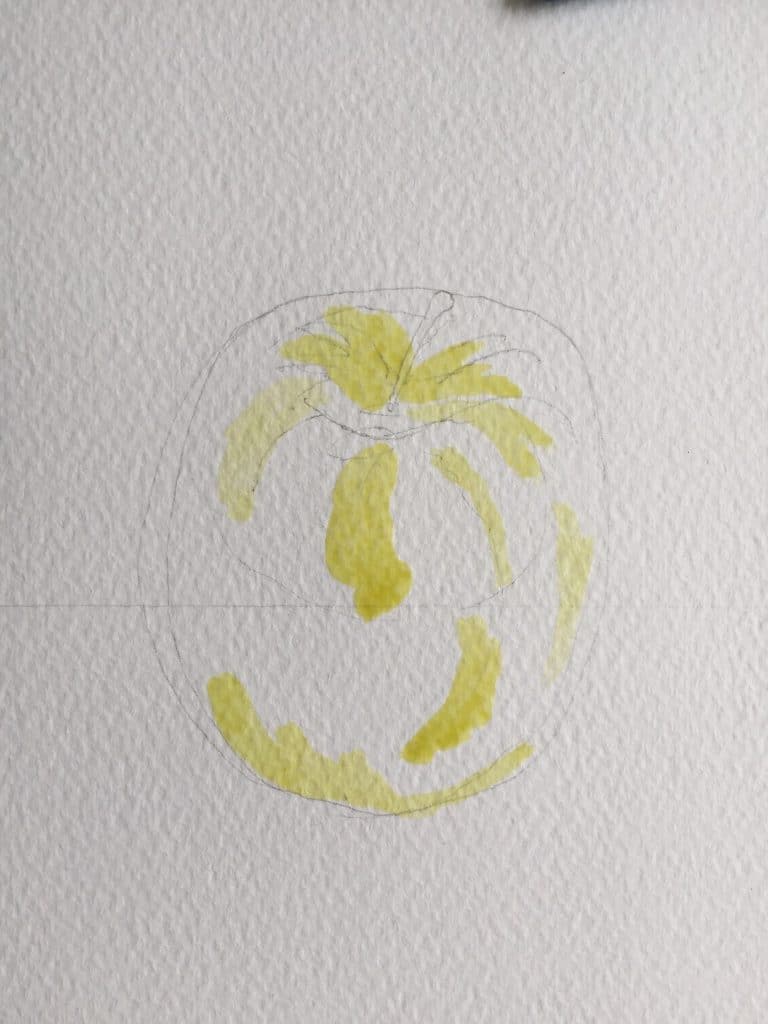
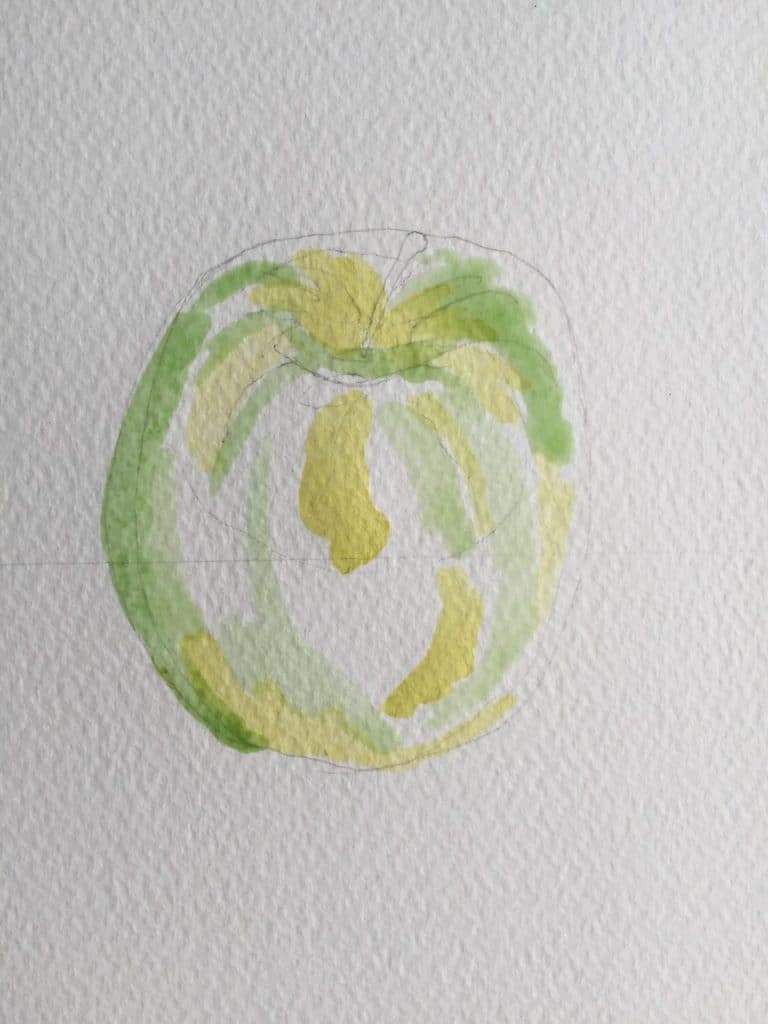
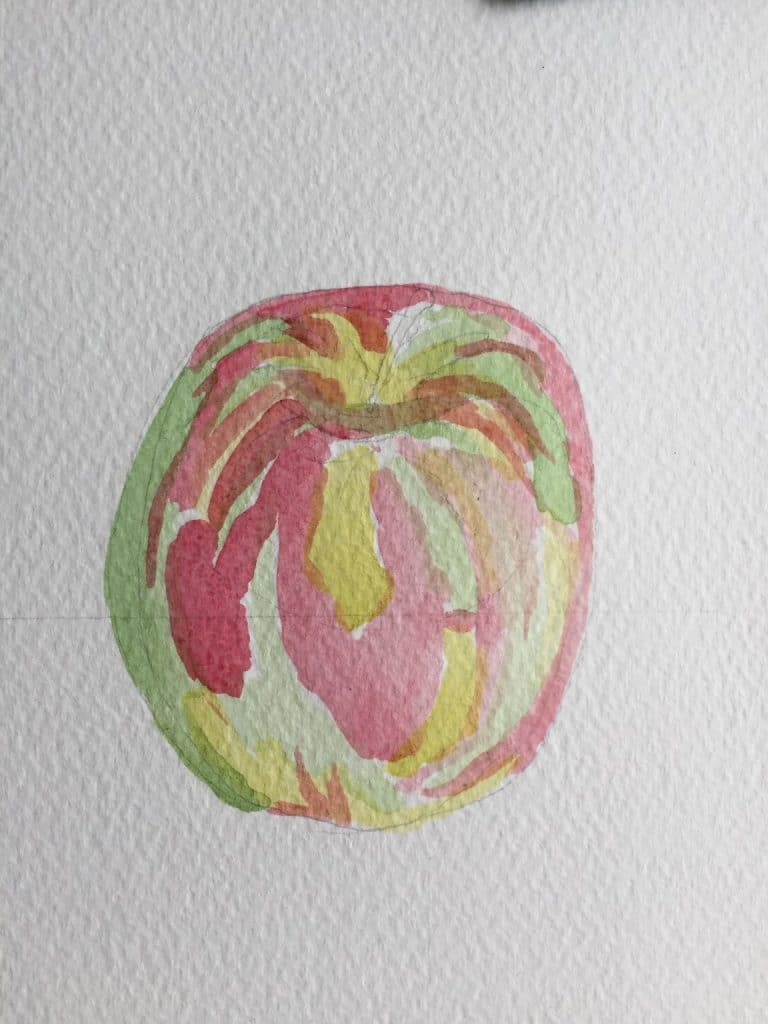
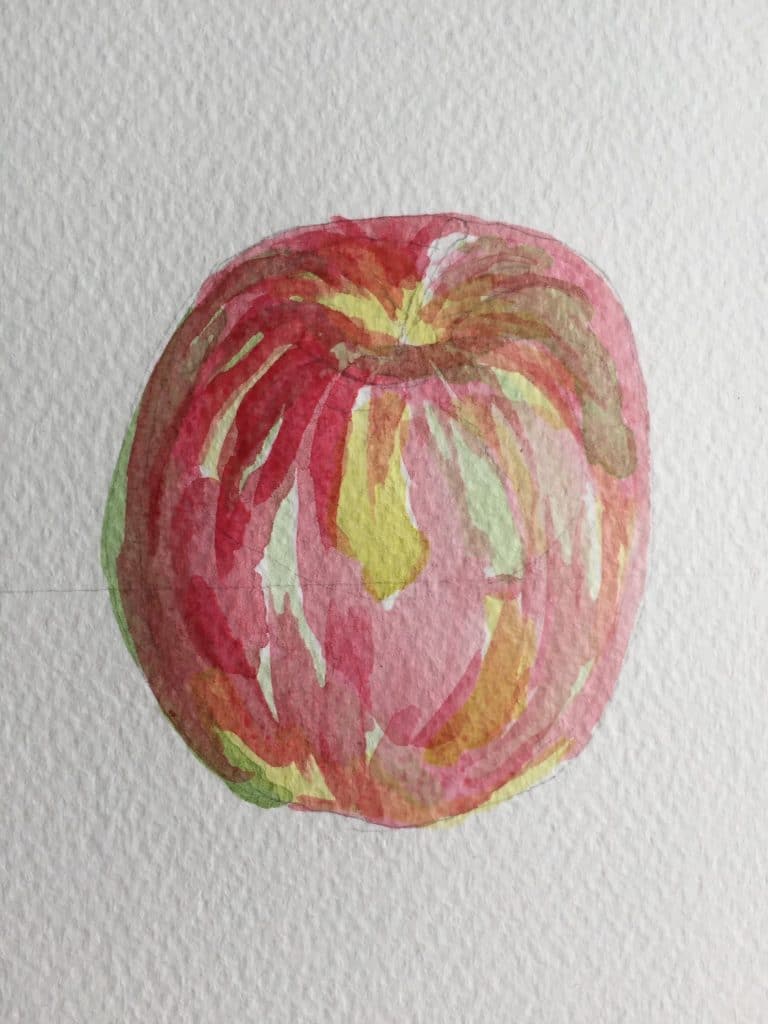
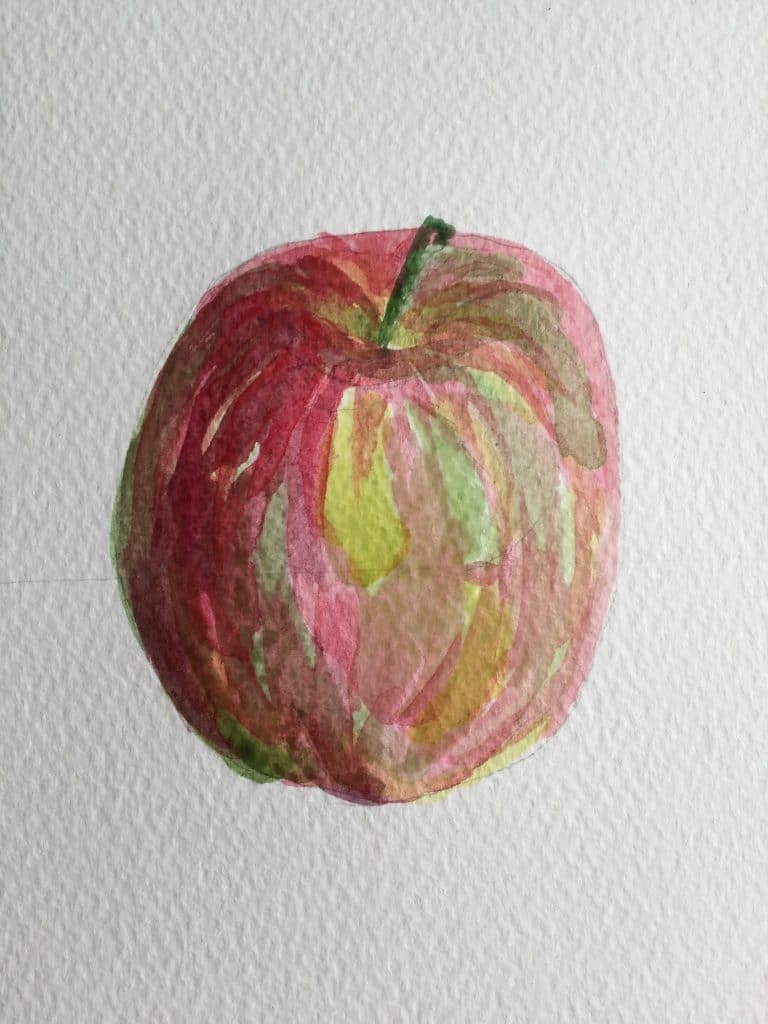
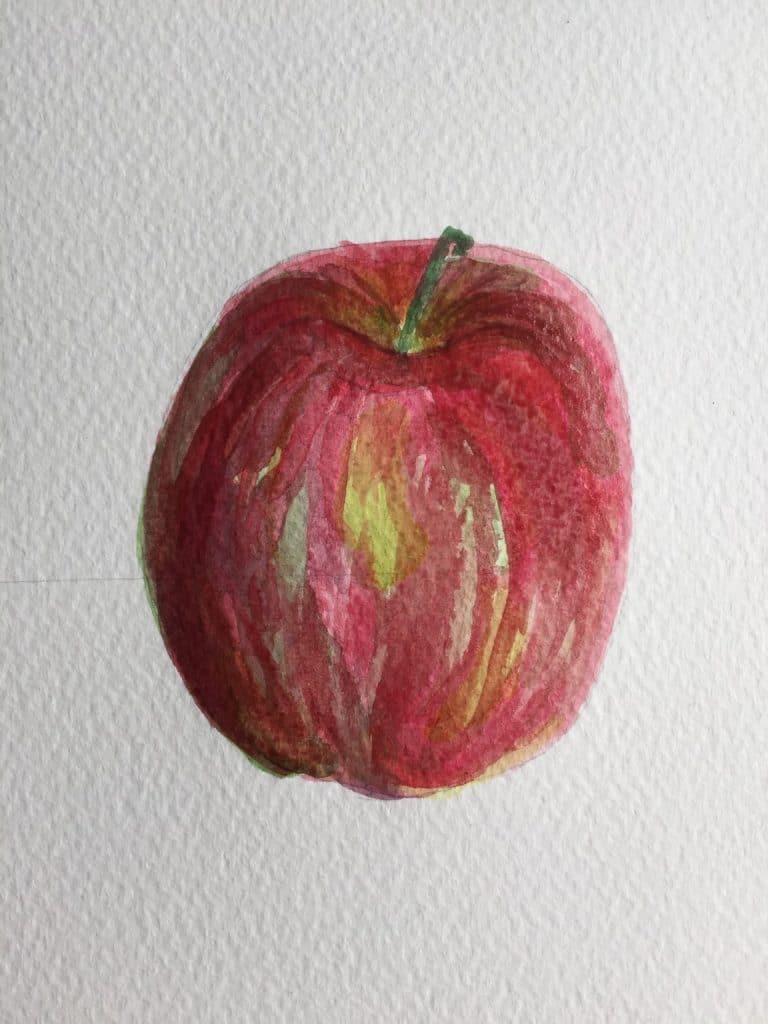
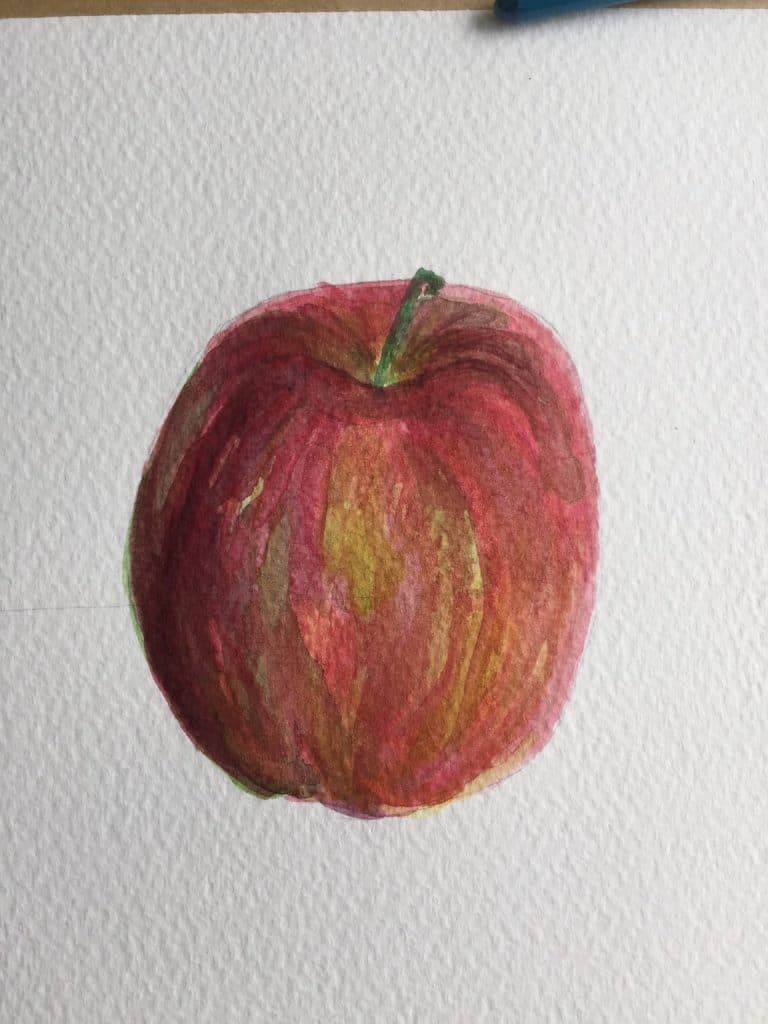
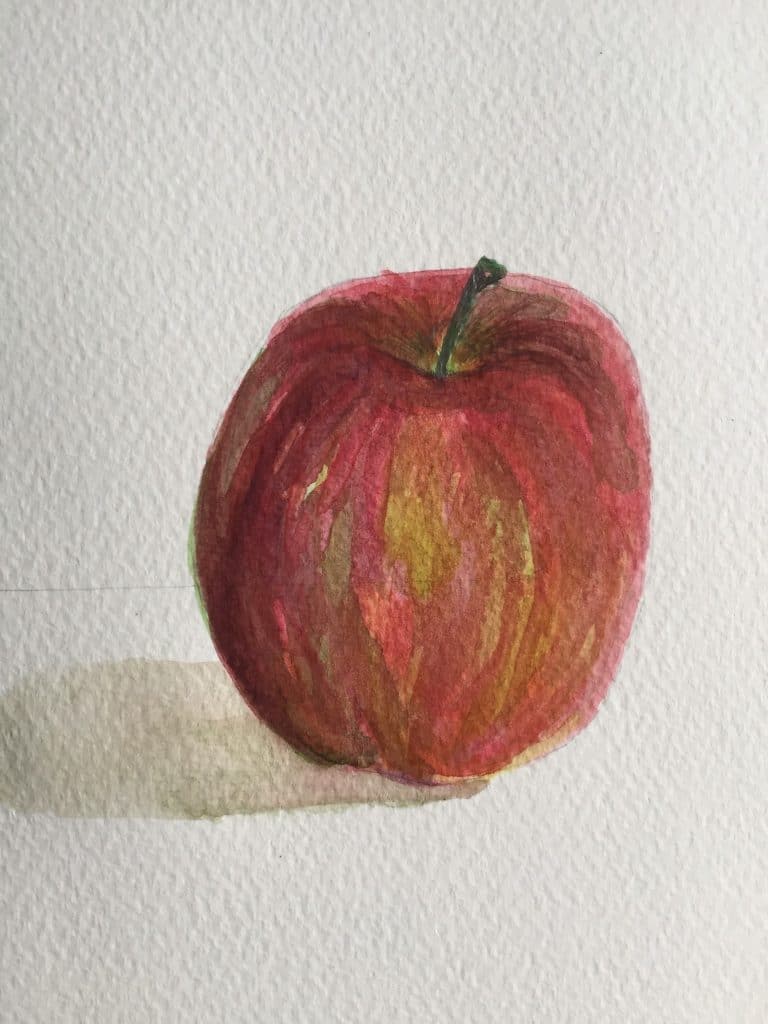
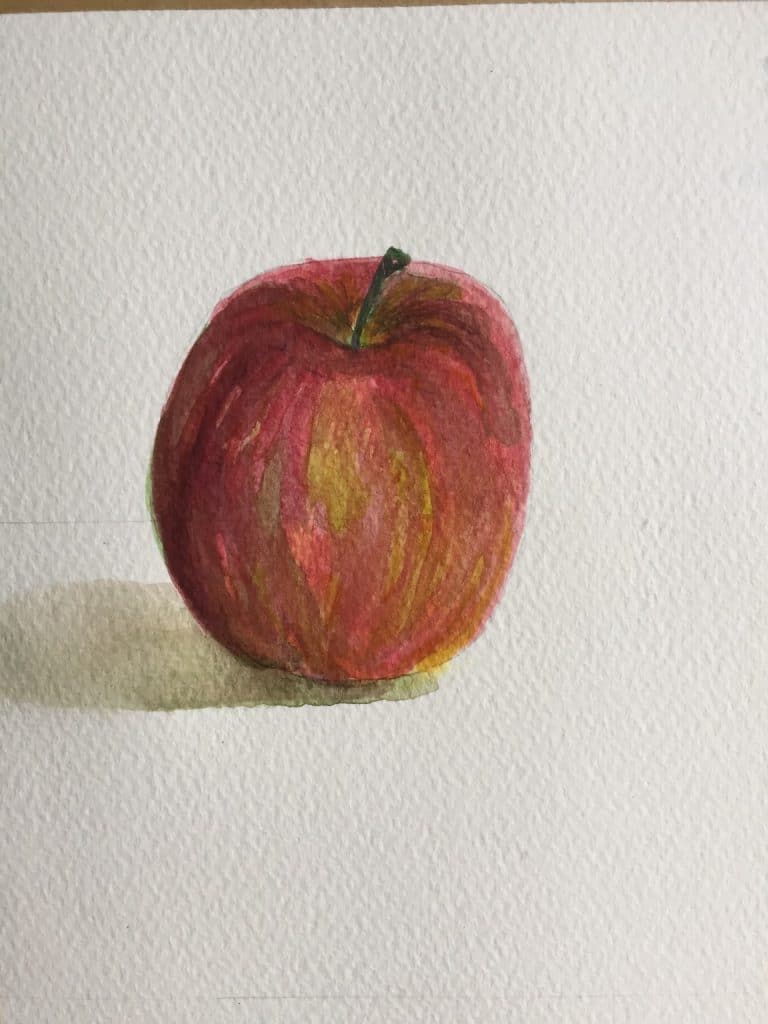
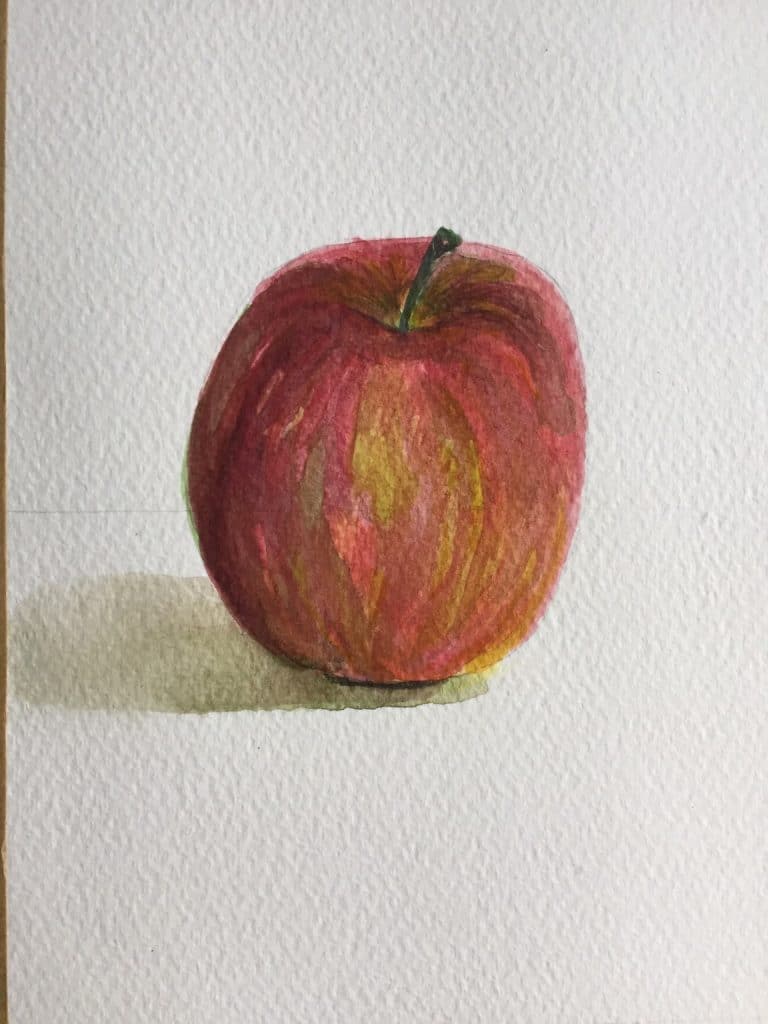
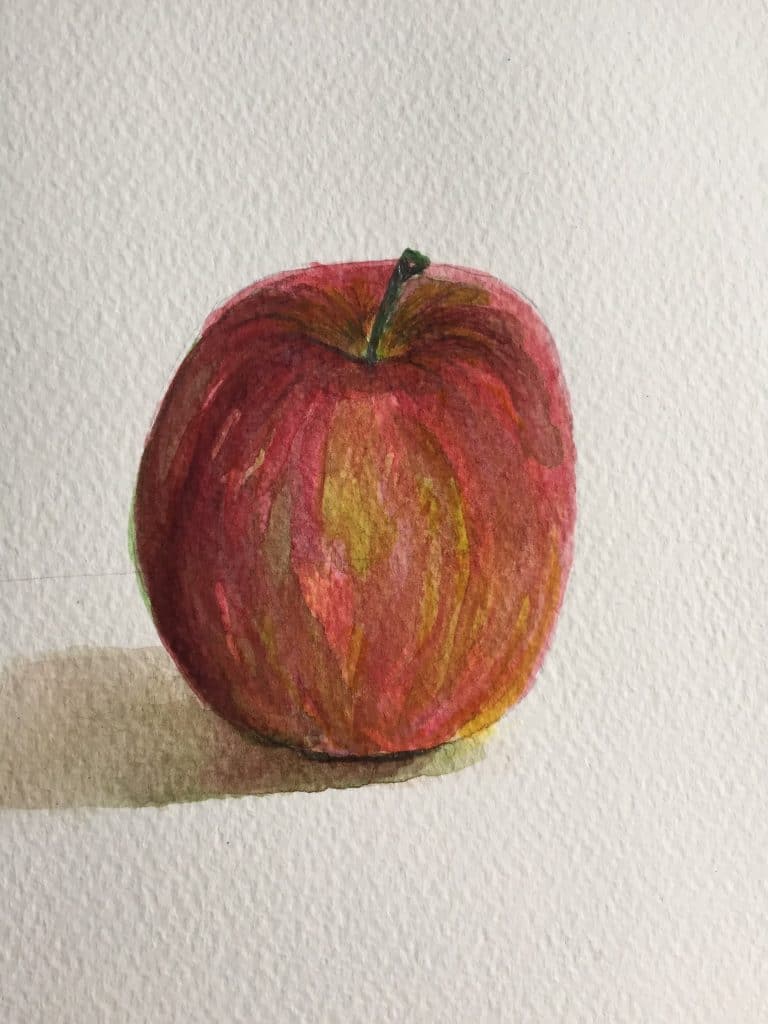
Right taking my ‘skills’ that I had picked up from the various tutorials I then did a few small scale ‘field studies’ (that’s painter speak for initial paintings before the main one is attempted). Apart from a few landscapes and some really random stuff I settled on fruit and chose to do an apple for my final piece. The one above was done with the watercolour pencil crayons and then you paint over it with a wet brush. Below is a step by step of my apple. This was done over the course of a few hours as this technique required you to let each colour or application onto the paper to dry before applying the next layer.

IMG_0810IMG_0811IMG_0813IMG_0818 IMG_0819 IMG_0820 IMG_0836 IMG_0839  IMG_0842 IMG_0843 IMG_0845

So in summary you need all the gear, time, patience and somewhere to hang your masterpiece. I’m definitely going to give it another go but won’t be putting my hand up the next time we require a watercolour specialist. If you are one of those individuals drop us a line as it’s always good to have a wealth of talent on the books.

Code Culture: Values

We have a great team. A team where each individual has their own set of skills and knowledge that enhances the group in their own way. However our differences can make things tricky at the best of times.

We wanted a means to work together effectively. A way to share our knowledge and understanding of the web development world plus look into improving our workflow and processes.

We needed a way to take a group of great individuals and make them an amazing team.

We wanted to avoid writing extensive documentation on our processes, they’re difficult to write, time consuming and no one ever reads them. Instead, we wanted to create an environment in which we can openly discuss, learn and improve on what we have as a team. A setting where we all have a shared ideal of what we want and where we want the team to go.

This is where our Code Culture comes into play.

Our Code Culture Values

Culture is a fuzzy thing. It occupies the invisible space between people. It’s almost impossible to create and is made up of many different elements. But the one thing that all cultures have is a set of values. It’s values that really define a culture and the people within them.

This is why we’ve set out to build our team on a set of shared values.

We have six values that define what we believe as a team:

  • Play as a team
  • Open mind, open source
  • Autonomy
  • Build with balance
  • Code is beautiful
  • Strive for greatness

Play as a team

We play as a team. Where we share the wins and the losses. Where code belongs to the team, not the individual. Where communication is key to a project’s success. A team where we respect and trust each other to write good code and ask for help.

Open mind, open source

We keep an open mind. We’re open to new ideas, tools and process so that we can explore and learn from them. We’re also flexible, allowing us to adapt and change quickly.

Autonomy

We use tools to automate mundane task so we can focus on more important things – building awesome projects. We too are autonomous. By having a clear workflow, shared resources and an organised code base, each developer knows what to do and how to do it, when the time arrives.

Build with balance

Building any website can be tricky. With much to consider when you look at the complexity of a website it is easy to make major sacrifices in one area for the sake of another, but this can cause problems. That is why we build with balance, looking to find the middle ground by considering all things.

Code is beautiful

Writing code is a creative endeavour, we build creative solutions that solve problems. That’s why we take pride and work to keep our code clean.

Strive for greatness

We want to be the best we can be and we do that by continuously learning and improving, both as individuals and as a team. We keep up to date with the fast-paced, ever-evolving world of web development, adopting professional practices and standards to keep us pushing forwards.

It starts with our values

It’s our values that form the foundation of our Code Culture. A foundation that we can build from as we come to improve our workflows, refine our process and become an amazing team.

This is only the beginning. As our team grows, so will our code culture, but its our values that remain constant.

Bookbinding

Recently I was privileged enough to take part in a Feed for my new Job. The Feed in question was to have a go at Bookbinding.

Skipping straight to the result, I have two books. One a very simple single section item which has a cover, held together with an easy bind. The bind is essentially a lone thread which holds about three pieces of folded paper together.

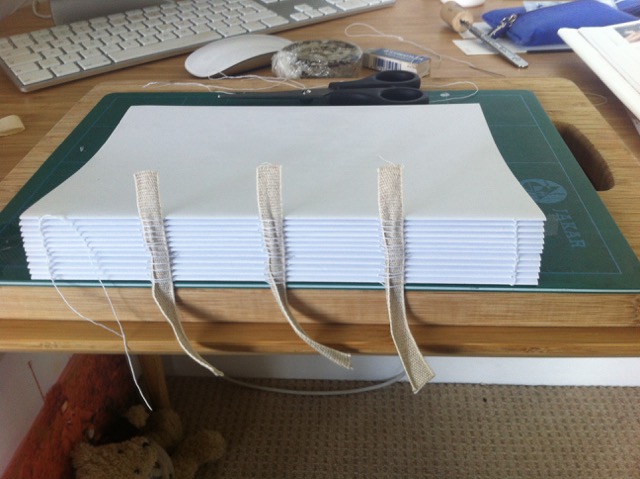
The second of the two books is an indication of the over ambition and expectation which easily took over the project. The book is unfinished, made up of several sections and precisely bound by tear drop shaped stitches running up both ends of the spine.

I feel that perhaps I am being generous to say that there are two books. With no cover, no finished stitching and a significant lack of glue on the spine the second book is not complete, however it does represent my experience of bookbinding quite well.

IMG_0967

The day started with coffee and a book. A book on binding books. It was lent to me by a fiend who has done something similar in the past. As she handed me the book and the relevant tools she said “this book makes it sound harder than it is”. The first section of the book was dedicated to the tools which are needed to get the job done. I am sure it would have been very useful to have weights in a variety of shapes and sizes, a special hammer as well as the dedicated time and space to get the job done properly. Immediately acting the expert I ignored most of the required items and laid out the tools which I considered essential to the job. Very methodically I followed the set of instructions to put together my first book. Excited and enthusiastic, 90% of my time was spent measuring and cutting the cover that I didn’t really want for the book that I felt was a bit boring in appearance. This is where ambition kicked in. Skipping the next section of the book I flipped over to the third project which was hard backed and covered in cloth. This matched much better with the end product I envisioned when first deciding to sample bookbinding.

IMG_0974

This style of book is made up of sections which are pieces of paper folded in half and stacked together with the folded edge of these sections being sewn together to form the spine of the book. The stitch that the book advised was called a Kettle Stitch and proved to very methodical. After folding and stacking paper, creating a template for punching holes and making those holes accurately distributed along the fold of each section, I was ready to start sewing my sections together. Starting at one end of the first section, the needle and thread works its way from one end to the other, back and forth, stitching each section to the next. After the third repetition of this process I knew I had too many sections, not enough time, not enough patience and not enough enthusiasm left to make the cloth bound finished article. It was at this point that I regretted using our kitchen chopping board to secure the expansion of my book.

IMG_0998

Finding time throughout the weekend and the evenings which followed I eventually managed to free up the chopping board and show off the skeleton of my second book. I feel proud about the end product having learned that, as is often the case, the first time always takes longer than I feel it should do. Much of the unaccounted for time is taken up with preparations, which when carefully done end up producing a much better product at the end. Fighting against preparatory tasks is a bit of a waste of energy and should instead be embraced, having said this I still maintain that the right tools are nice but not essential. As with most things, practice makes perfect and there are no shortcuts! I very much doubt that this is the start of a career change but I am very happy to have experienced an art which is still immensely useful to this day. If there is one thing which I have taken away from this, it is to take a special interest with what we work on. Whatever it is, give it the care and attention it deserves.

Contact

Venn Creative, 59-61 Killigrew Street, Falmouth, Cornwall, TR11 3PF

01326 377 105 | [email protected]